Markers
This topic is too comprehensive to be covered as a subcategory. Therefore, a dedicated category is provided with detailed information about Markers. This section describes only how to interact with Markers within a project. Any summarized or unexplained parts include references to the corresponding topics in the Markers category, where they are explained in detail.
Selecting the second button in the Project Functions sidebar opens the Markers section.
Markers are commonly used to visually tag locations on a map. This type of tag also contains information that can be added and edited by users. Additional details are available in the Markers category.
The Markers tab includes two buttons, a search filter, and a list.
1. Create Polygon
The Create Polygon button allows areas to be marked as Markers instead of single points. Pressing this button enables area creation by placing points on the map. To close the area, select the first point, which completes the polygon. Once closed, the shape can still be repositioned if necessary.
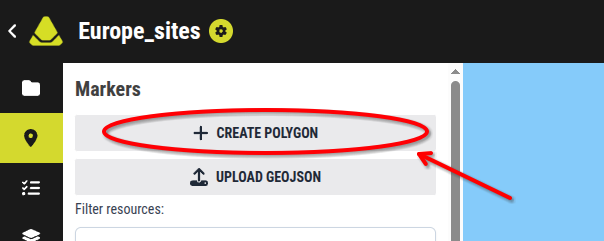
[Showcase of the Create Polygon button]
During polygon creation, two buttons are displayed in the adjacent side/full-screen panel:
- Cancel Polygon Creation – Suspends the process, removes the shape, and prevents the polygon from being created.
- Save Polygon – When pressed, it requires selecting the state under which the polygon should be listed.
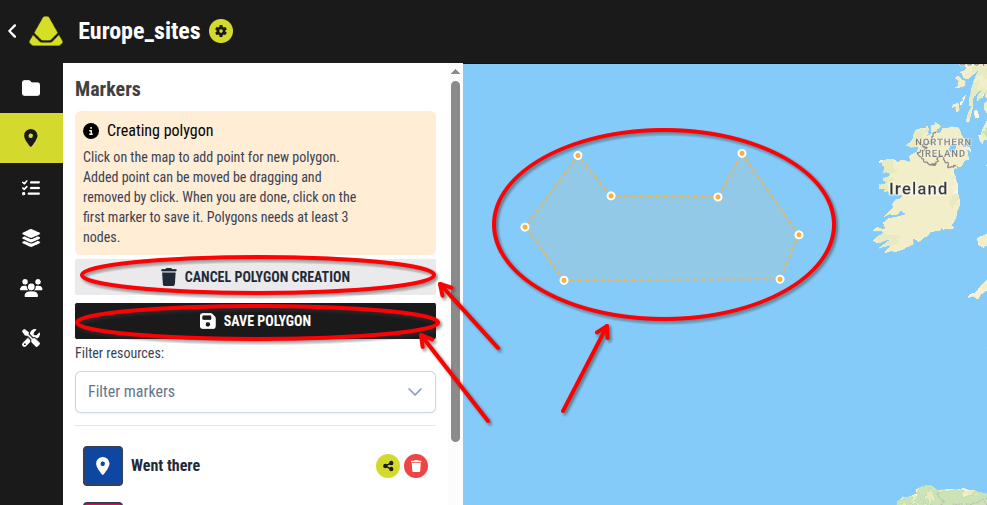 [Showcase of the creation process of a polygon]
Once completed, the process finishes, the polygon is created, and it is displayed on the map. When a polygon is created, it is added to the Markers list and can be interacted with similarly to a standard marker, with some exceptions for functions that apply exclusively to markers or polygons.
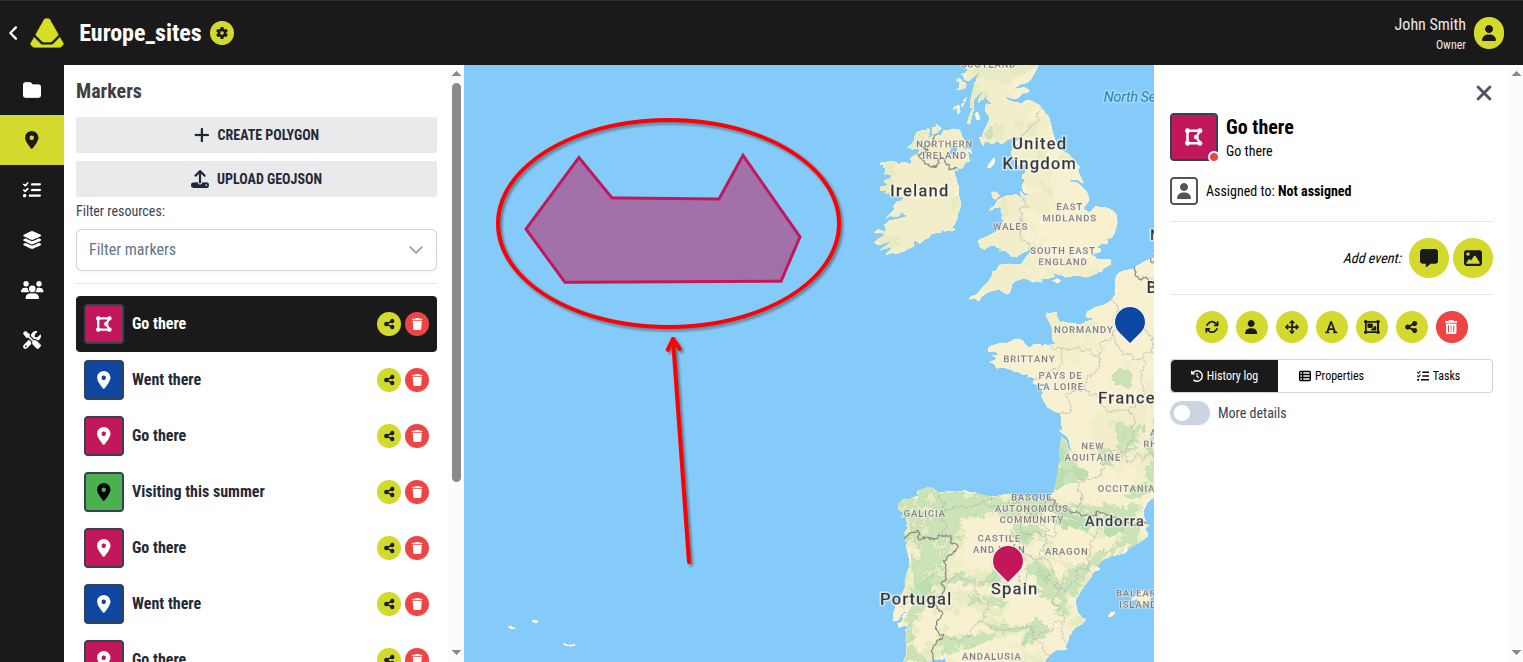
[An example of a polygon inside a project]
2. Upload Geojson
Tohle ještě prober tomu tolik nerozumíš.
3. Markers list
Below these two buttons begins a section referred to as the Markers list. This section displays all markers within the current project. Each marker can be interacted with individually, and the list itself includes tools for better navigation and filtering.
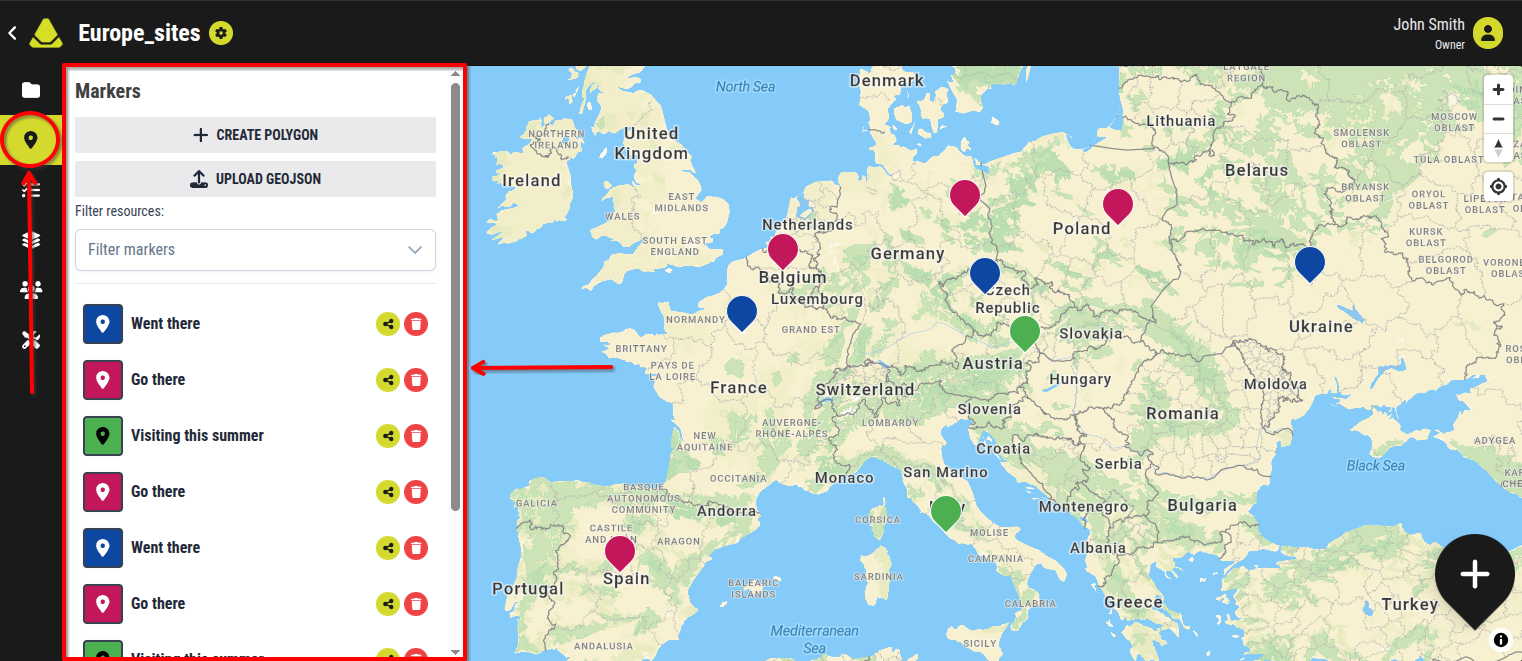
[Showcase of the markers list section]
The list is organized into rows, where each row represents a single marker. Each row contains (from left to right):
The markers list also indicates whether markers are part of a resource group. Resource group are displayed at the top of the list. All markers that belong to a group are shown below the group name. Markers within a group are slightly offset to the right. This indentation makes it easy to visually distinguish between grouped markers and those that are not part of any group.
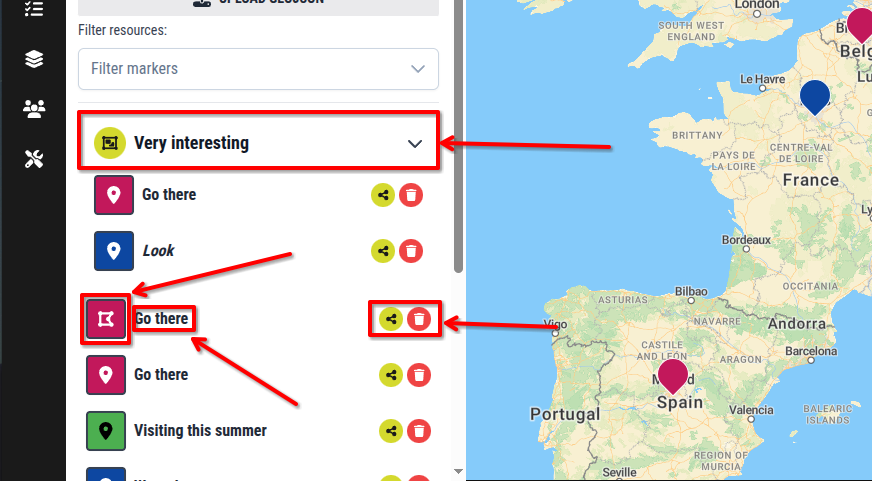
[Showcase of the specific aspects of the markers list]
Clicking on a marker in the list opens its detailed interface, allowing interaction with that specific marker. The selected marker is highlighted in the list to clearly indicate which one is currently active. The selected marker also glows on the map.
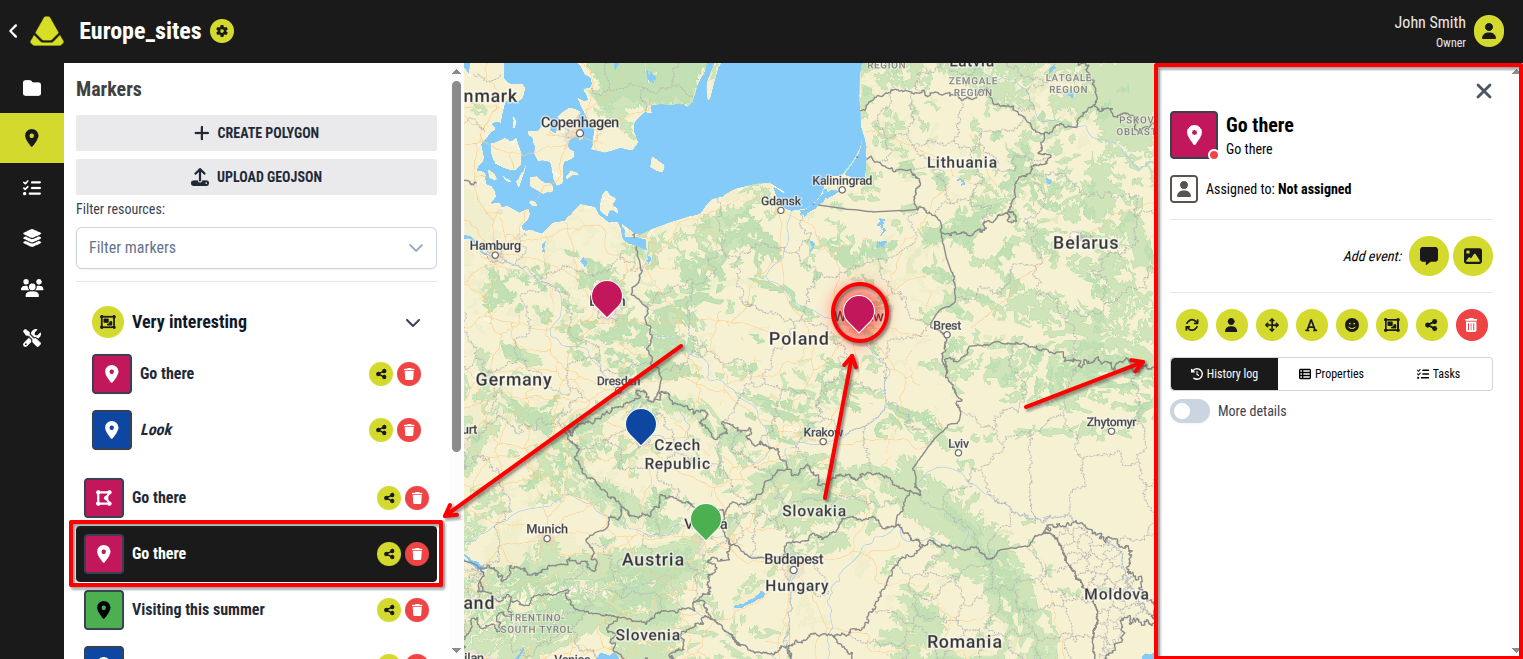
[An example of how an selected marker might look like]
At the bottom of the list, there is a checkbox labeled Archived markers.
- When checked, archived marker are included in the list
- When unchecked, archived marker are hidden
Above the list, directly below the Create Polygon and Upload GeoJSON buttons, is the filtering tool labeled Filter resources, which allows you to refine the displayed marker.
4. Filter Resources
The filtering tool allows the markers list to display only markers that match the desired search criteria. Pressing this option dropbox opens a list of filtering options:
Selecting any option requires providing additional details to complete the filter. When an option is selected, it can be canceled by clicking on the cross that appears on the right side inside the same box.
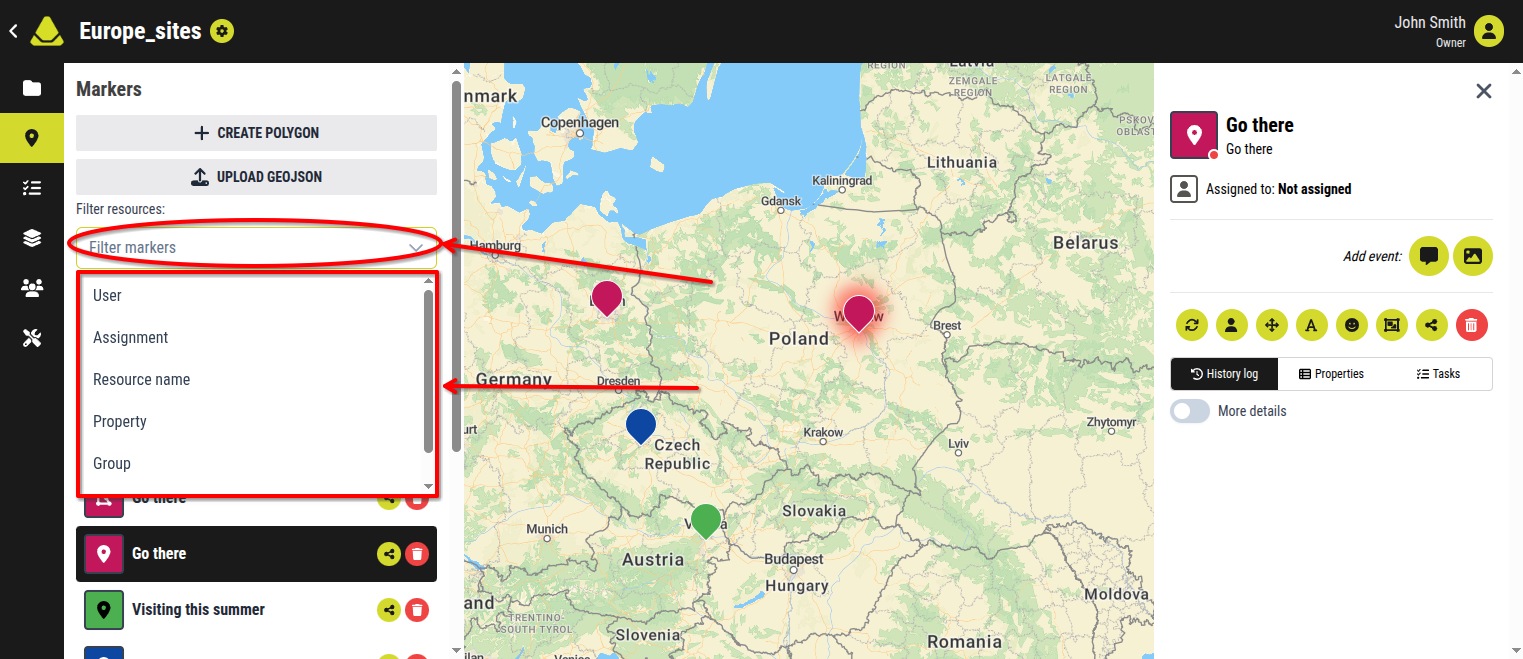
[Showcase of the Filter Resources for a marker]
4.1. User
When the User filter is selected, an additional box appears. Clicking this box displays a list of all project members. Select the name of the user whose markers should be displayed in the markers list below.
4.2. Assignment
When the Assignment filter is selected, an additional selection box appears. Clicking this box gives you two options:
- Assigned
- Unassigned
Selecting one of these options will filter the markers list accordingly:
- Choosing Assigned shows only markers that are connected to tasks
- Choosing Unassigned shows only markers without any tasks connection
Use this filter to control which markers are displayed in the markers list below.
4.3. Resource Name
Resource Name is equivalent to the marker name. These terms refer to the exact same thing.
When the Resource Name filter is selected, an additional text box appears.
You can type into this box to search for markers by name. The list will automatically update to display only markers whose names contain the entered text.
This allows you to quickly find specific markers within the project.
4.4. Property
When the Property filter is selected, three additional fields appear:
- "Enter property name" textbox
- Relational operator selection box
- "Enter property value" textbox
These fields allow you to filter markers based on their marker properties.
- In the first textbox, enter the name of the property you want to filter by
- In the second box, select a relational operator (such as)
- In the third textbox, enter the value you want to compare against
The markers list will then display only those markers whose property matches the defined condition.
Example: If you want to find all markers where the property water height is less than 2 meters:
- Enter "water height" in the first textbox
- Select " < " in the second box
- Enter "2" in the third textbox
4.5. Group
Resource Group is equivalent to marker groups. These terms refer to the exact same thing.
When the Resource Group filter is selected, an additional selection box appears. Clicking this box provides a list of all of the resource groups that exist in this project.
Selecting one of the groups will filter the markers list to display only markers that have been linked with the selected resource group.
4.6. State
When the State filter is selected, an additional selection box appears.
Clicking this box displays a list of all marker states available in the current project.
Selecting one of these states will filter the markers list to show only markers that have the selected state assigned to them.