Project UI
This section explains the overall design of a GeoWork project and how to interact with it.
GeoWork is available on both desktop and mobile devices. While the user interface differs between these platforms, the only consistently displayed element across all versions is the Base Layer.
The detailed explanation of the interface will be divided later into two parts: one for the desktop version and one for the mobile version.
Please refer to the section relevant to the device being used. Reading both sections is recommended for a complete understanding of the interface.
Base Layer
A world map is the Base Layer of each and every single one GeoWork project. It is because GeoWork is intended to work in the field. It is made to interact with, as markers, users, layers, vehicles, all appear on it, and thus it is the backbone of the project. Everything in GeoWork is somehow related to location.
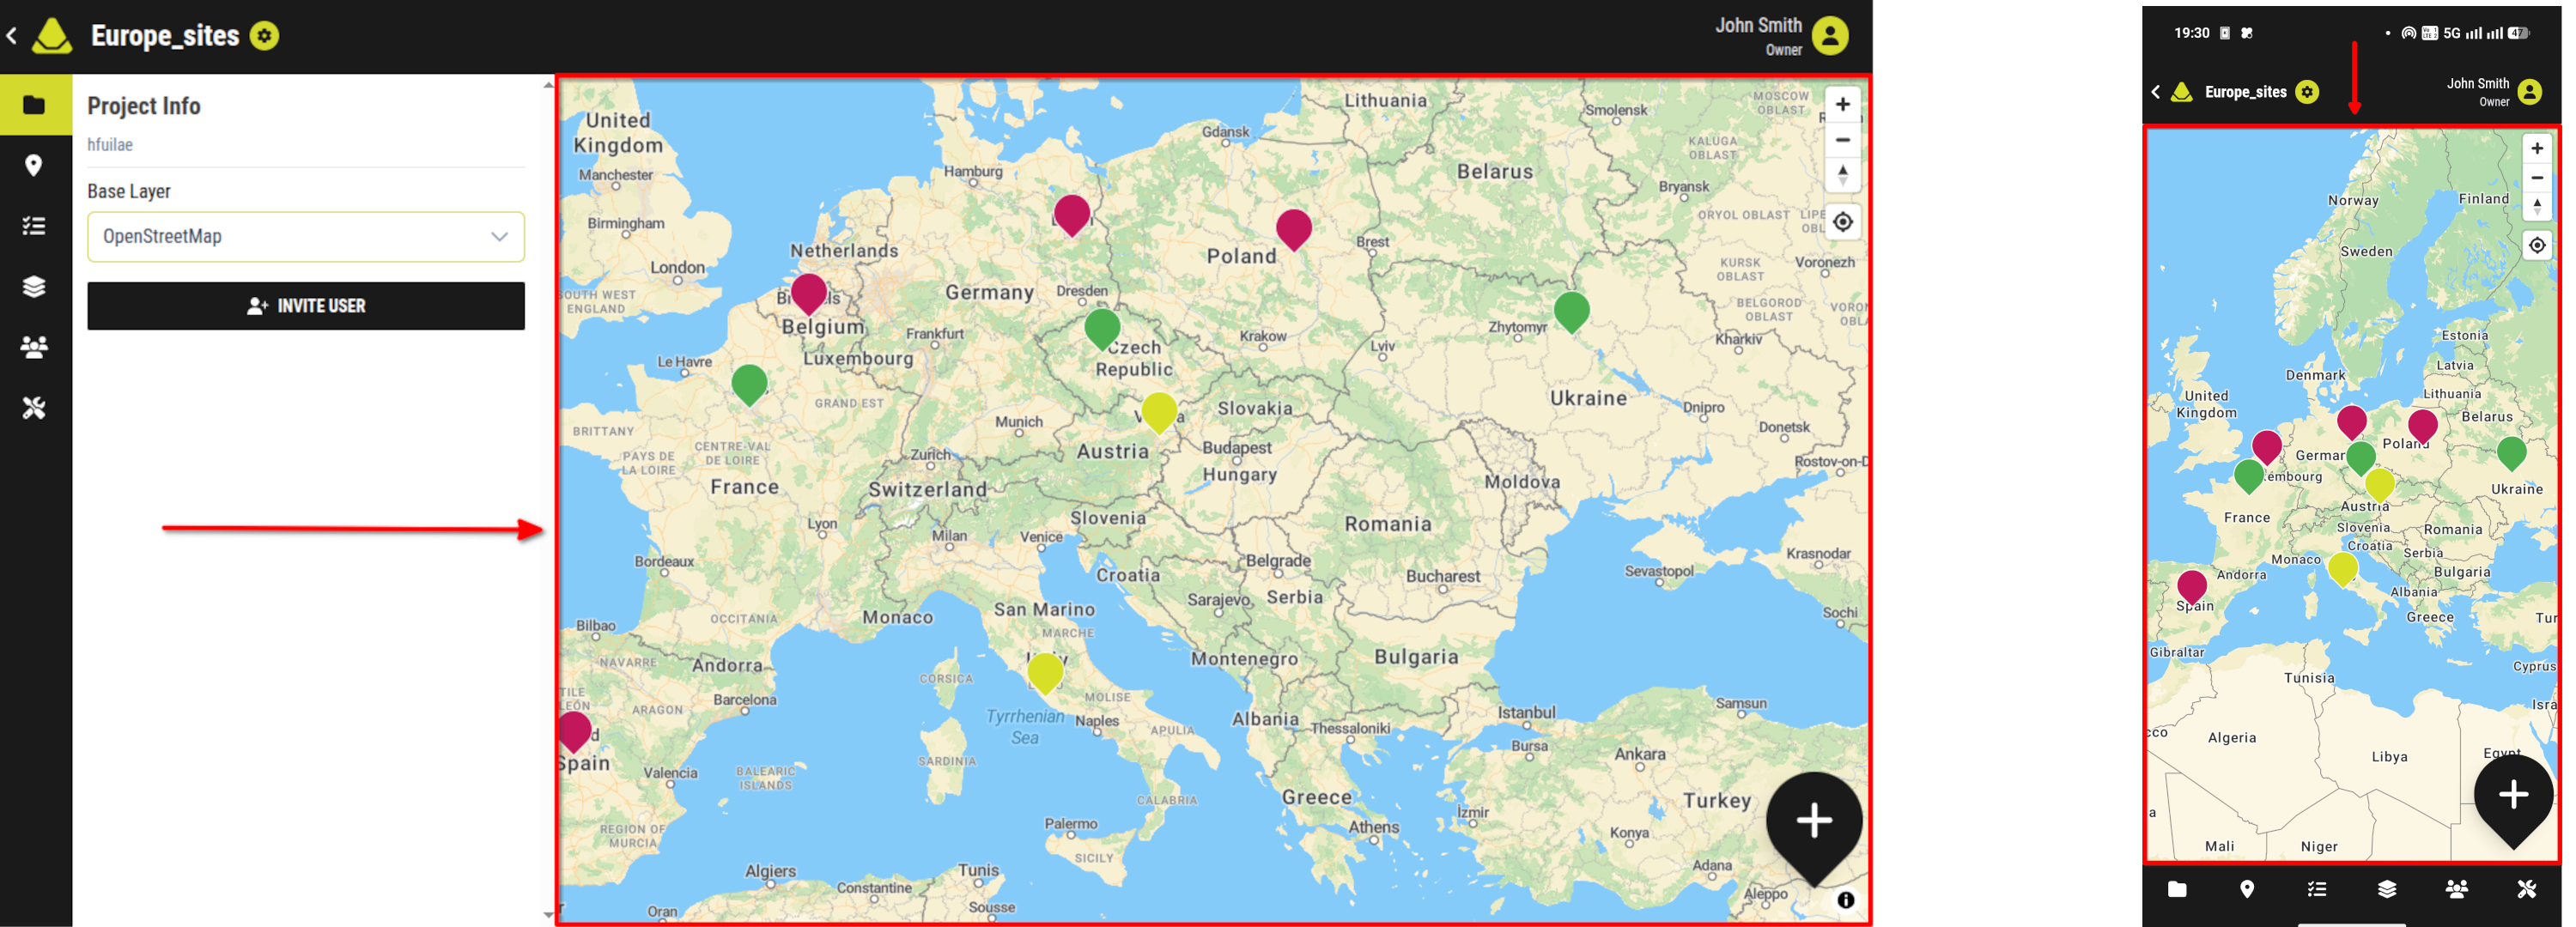
[An example of how the base layer in a project may look like]
There are two types of Base Layers in GeoWork:
- OpenStreetMap (visit the OpenStreetMap website to learn more)
- Aerial
Switching between them can be done in the project info tab of the project funtcions sidebar.
A world map is the Base Layer of every GeoWork project. Each project is built on a Base Layer, which represents the environment where all activities take place. Since GeoWork is designed for fieldwork, the map is not just a background—it is an interactive workspace where markers, users, layers, and vehicles are displayed and managed.
Everything in GeoWork is directly connected to location, making the Base Layer the foundation of the entire project.
There are two types of Base Layers available in GeoWork:
- OpenStreetMap (visit the OpenStreetMap website to learn more)
- Aerial map
You can switch between Base Layers in the project info tab, located in the project functions sidebar.
1. Desktop Layout
When opening a project, the map is displayed first. It serves as the primary workspace and central canvas of the project.
Displayed above the map are:
1.2. Project functions sidebar
1.3. Map control buttons
1.4. Add Marker button
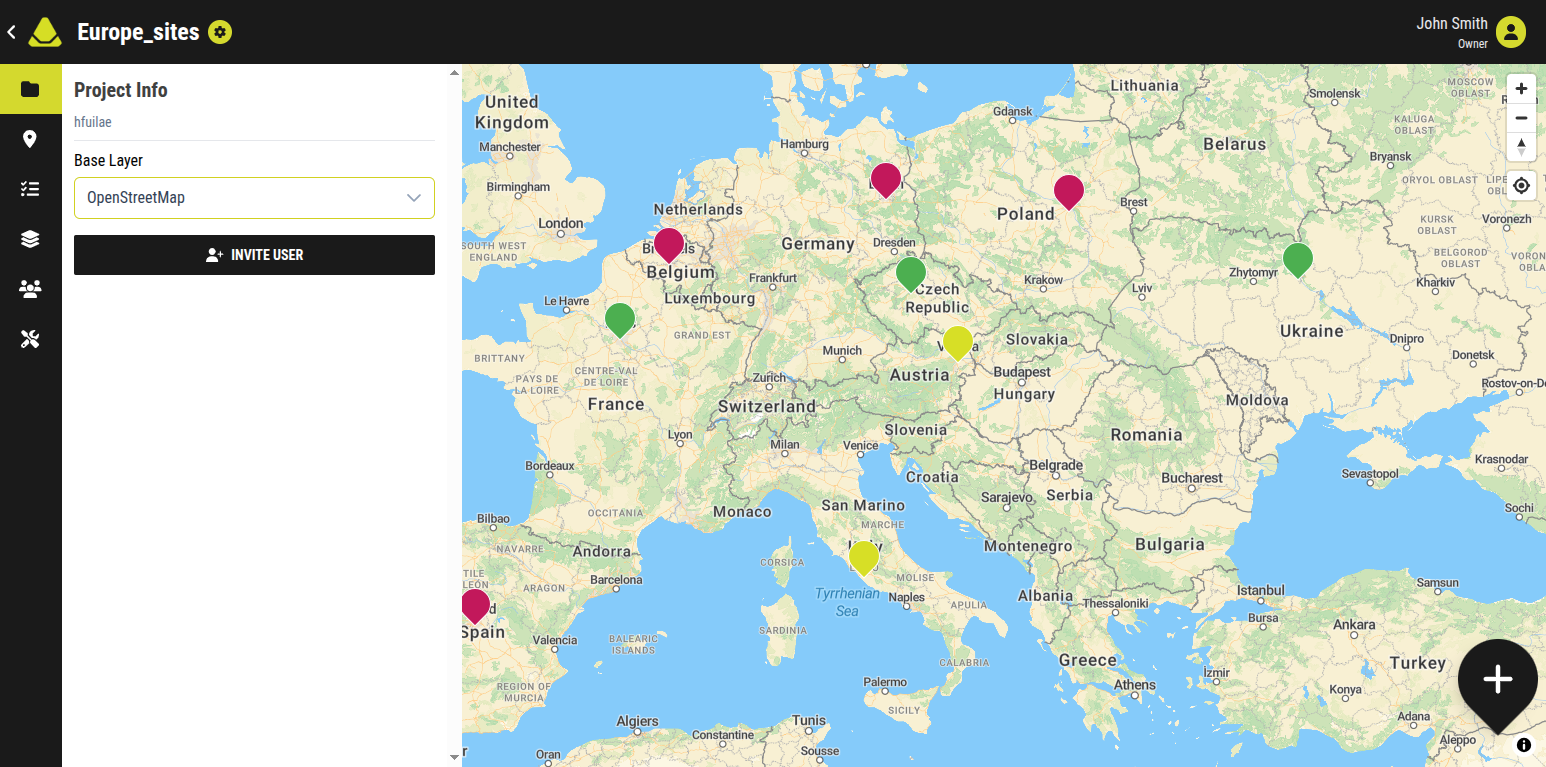
[Showcase of the desktop layout of a GeoWork project]
1.1. Global navigation bar
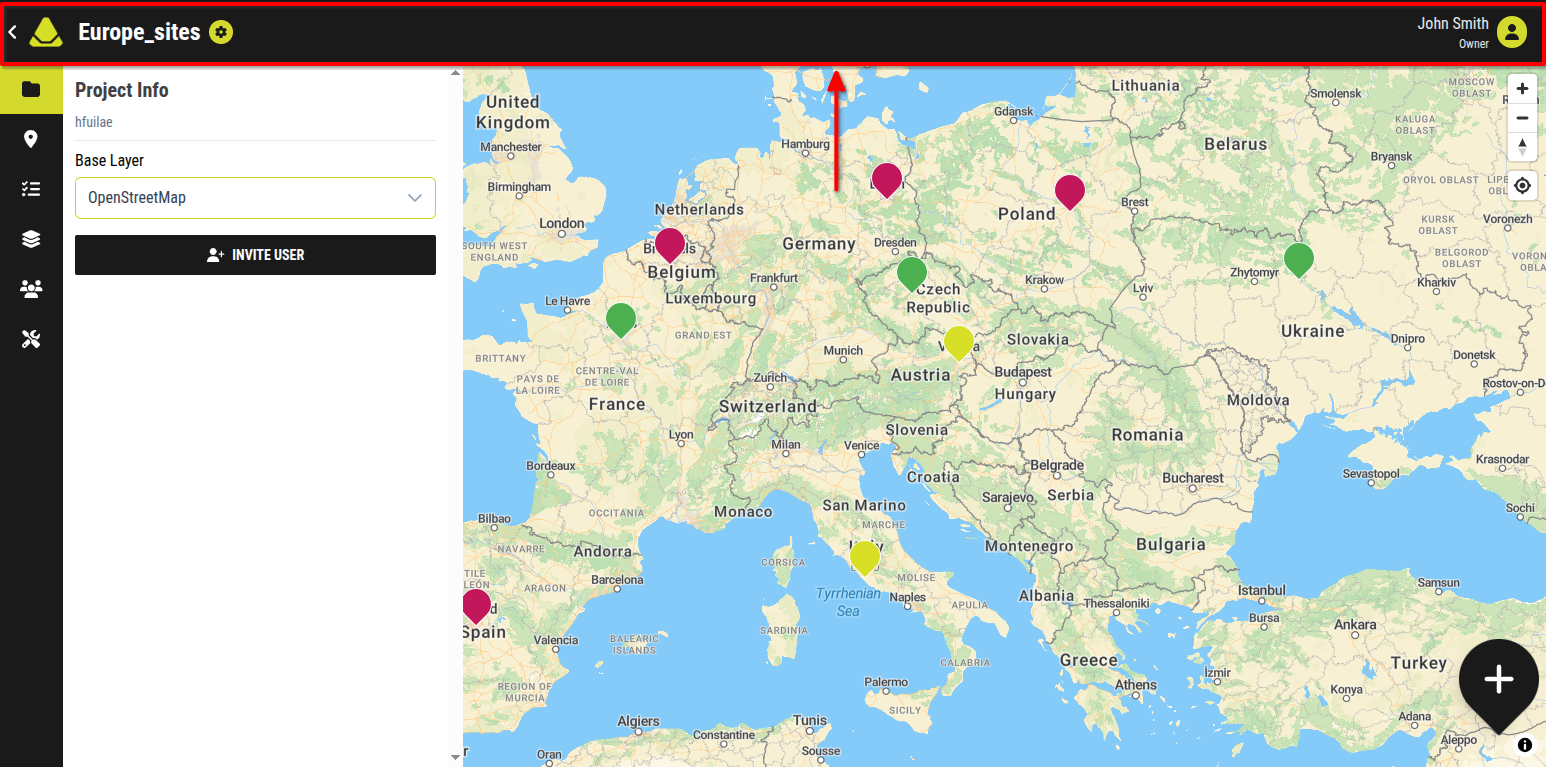
[Showcase of the Global navigation bar inside a project]
A navigation bar spans the full width of the screen at the top of the interface. This bar provides access to essential features that remain available regardless of where you are within the project.
On the far left side of the navigation bar, a left-pointing arrow is displayed. Selecting this arrow returns you to the dashboard. Next to the arrow, the project name and the Settings button are shown. Selecting the Settings button opens the project settings section.
On the right side of the navigation bar, your user profile is shown, including your profile picture and your assigned role within the specific project.
1.2. Project functions sidebar
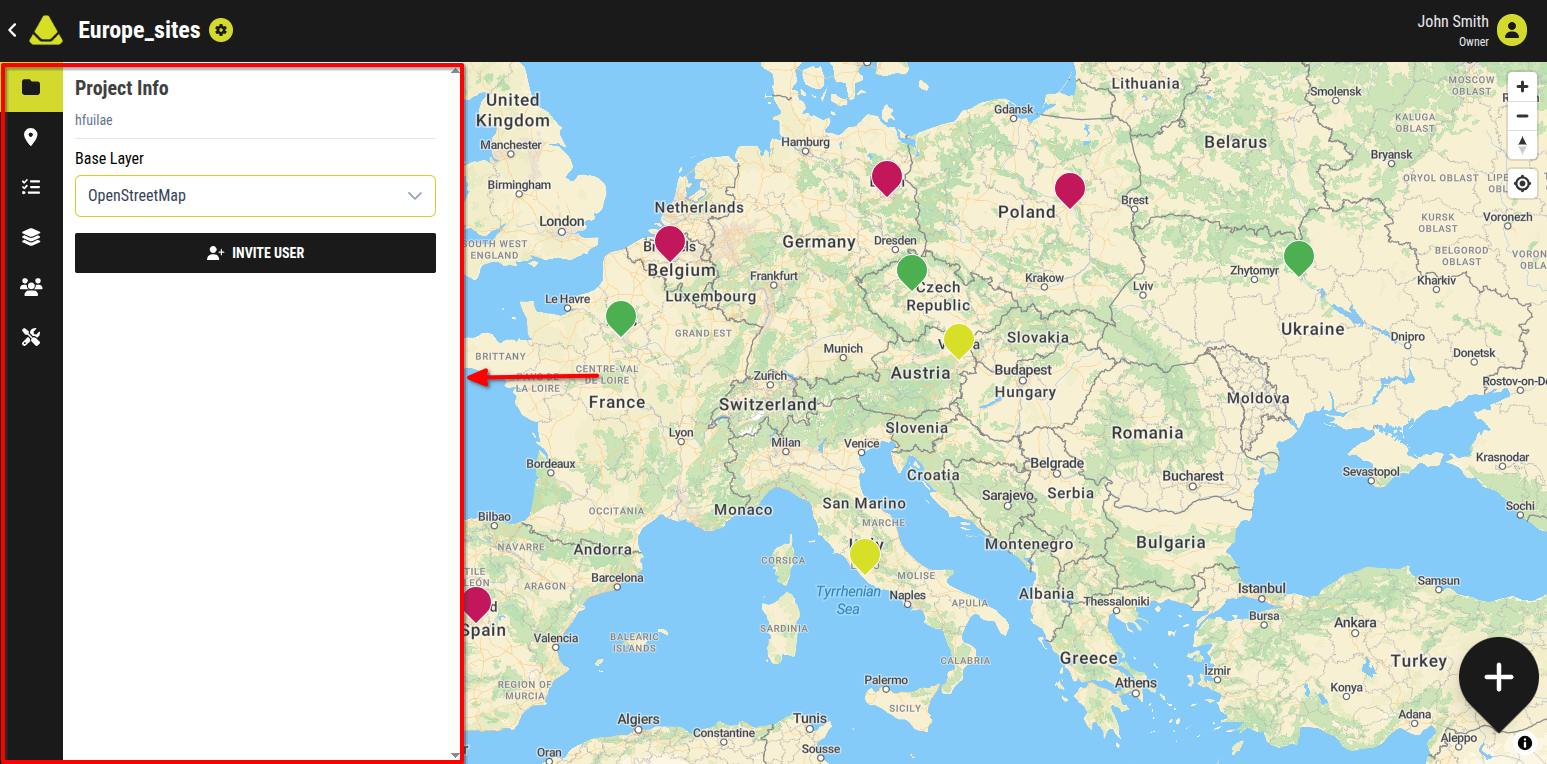
[Showcase of the Project functions sidebar inside a project]
On the left side of the screen, a navigation panel containing multiple tabs is permanently displayed. These tabs include Project Info, Markers, Tasks, Layers, Members & Vehicles, and Tools.
When one of these tabs is selected, an adjacent side panel opens, allowing you to interact with the corresponding feature category.
By default, when a project is opened, the Project Info tab is displayed.
1.3. Map control buttons
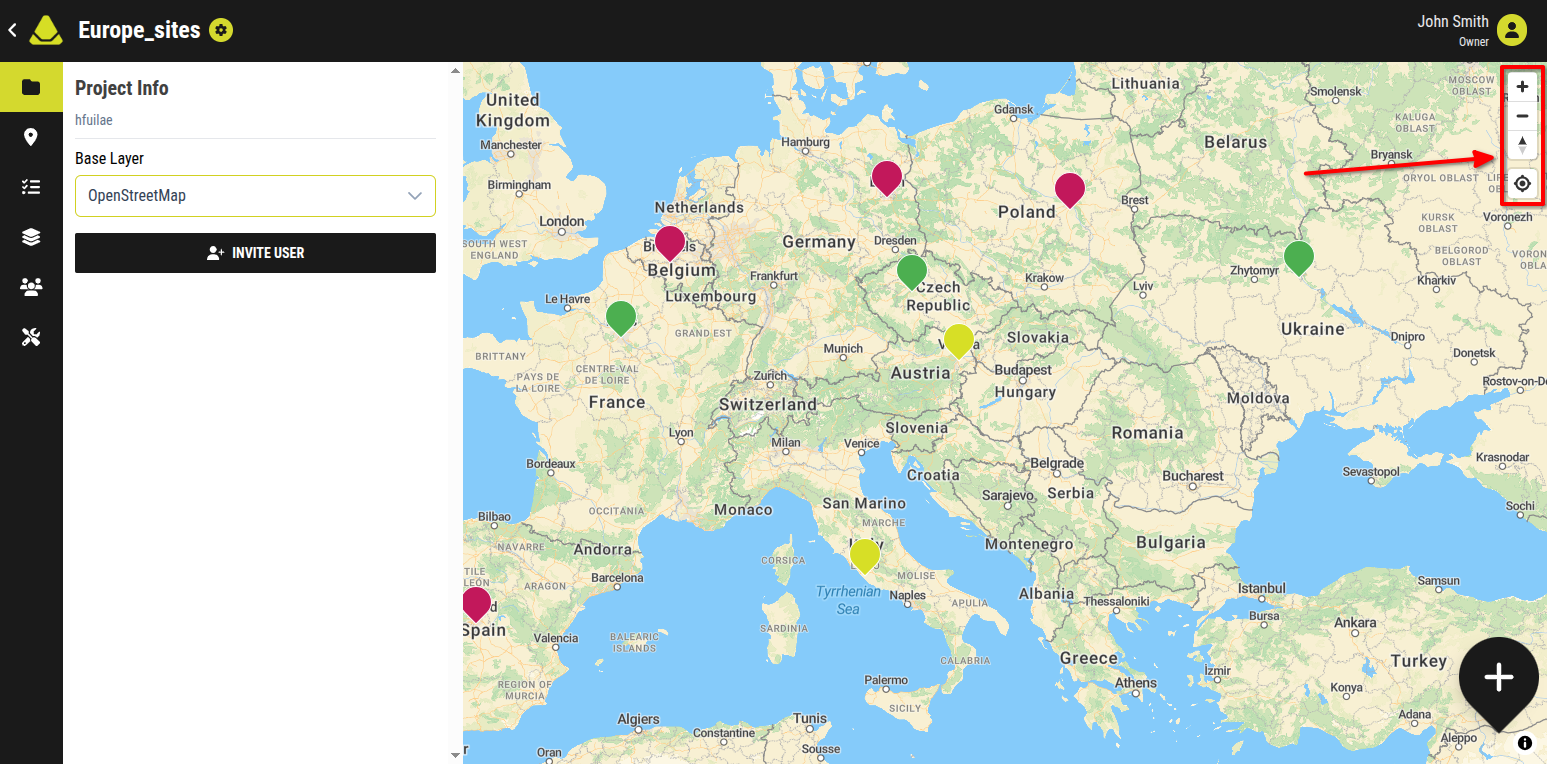
[Showcase of the Map control buttons inside a project]
In the top right corner, below the global navigation bar, four vertically aligned buttons are displayed. These buttons provide controls for interacting with the map.
The “+” and “–” buttons adjust the zoom level of the map view.
Below them, a compass icon indicates the direction of north, helping users maintain orientation regardless of how the map is rotated.
The lowest button centers the map on the current location of the user.
1.4. Add marker button
In the bottom right corner of the screen, a “+” button is displayed. This button is used to add markers to the project. When selected, three options are displayed:
- Create Marker from Current Location
- Create Marker from Gallery Photo
- Create Marker from Arbitrary Position
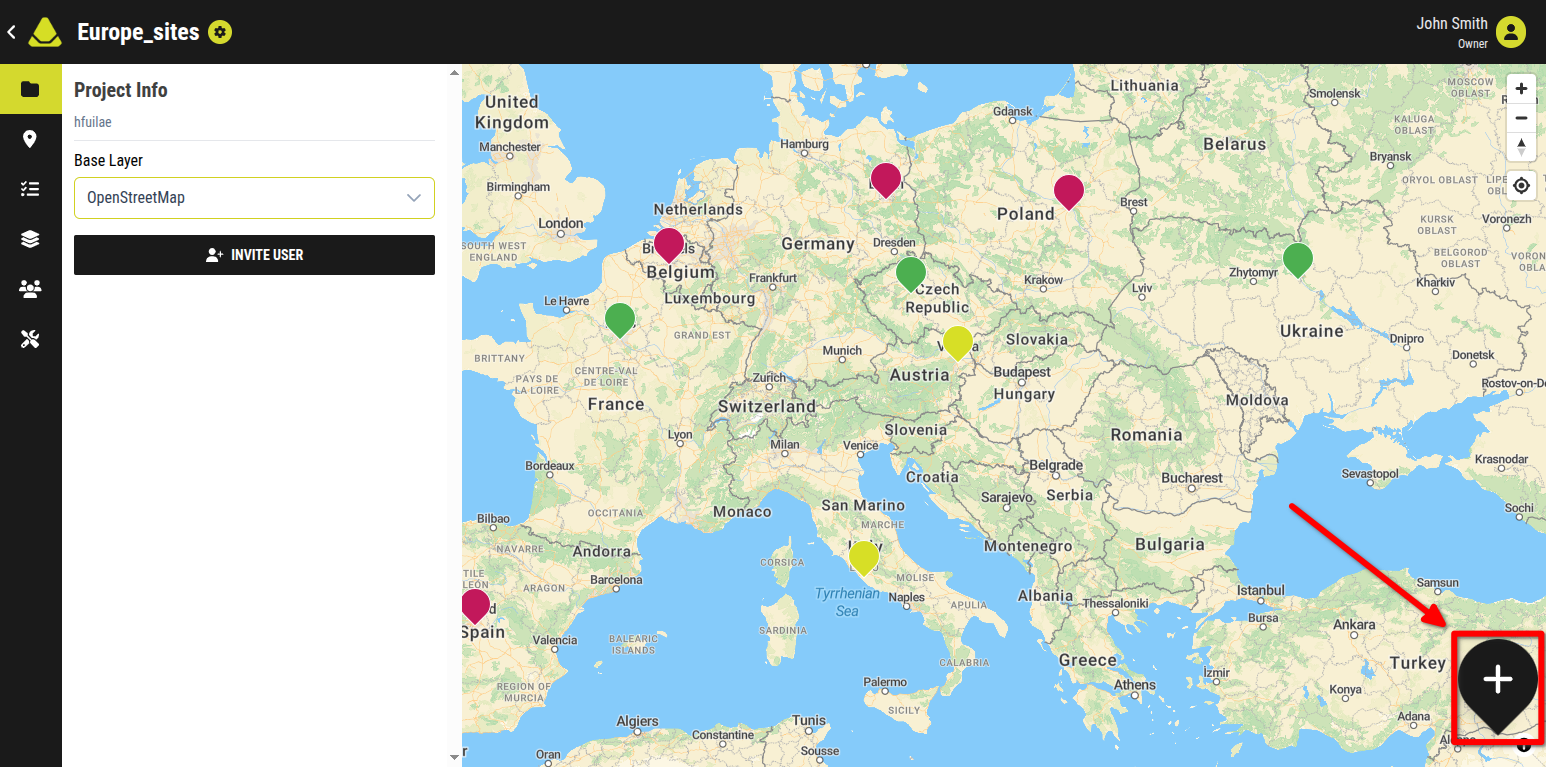
[Showcase of the Add marker button inside a project]
Each option creates a marker using a different method. For more detailed information, please refer to the markers section.
2. Mobile Phone Layout
When opening a project, the map is displayed first. It serves as the primary workspace and central canvas of the project.
Displayed above the map are:
2.2. Project functions sidebar
2.3. Map control buttons
2.4. Add Marker button
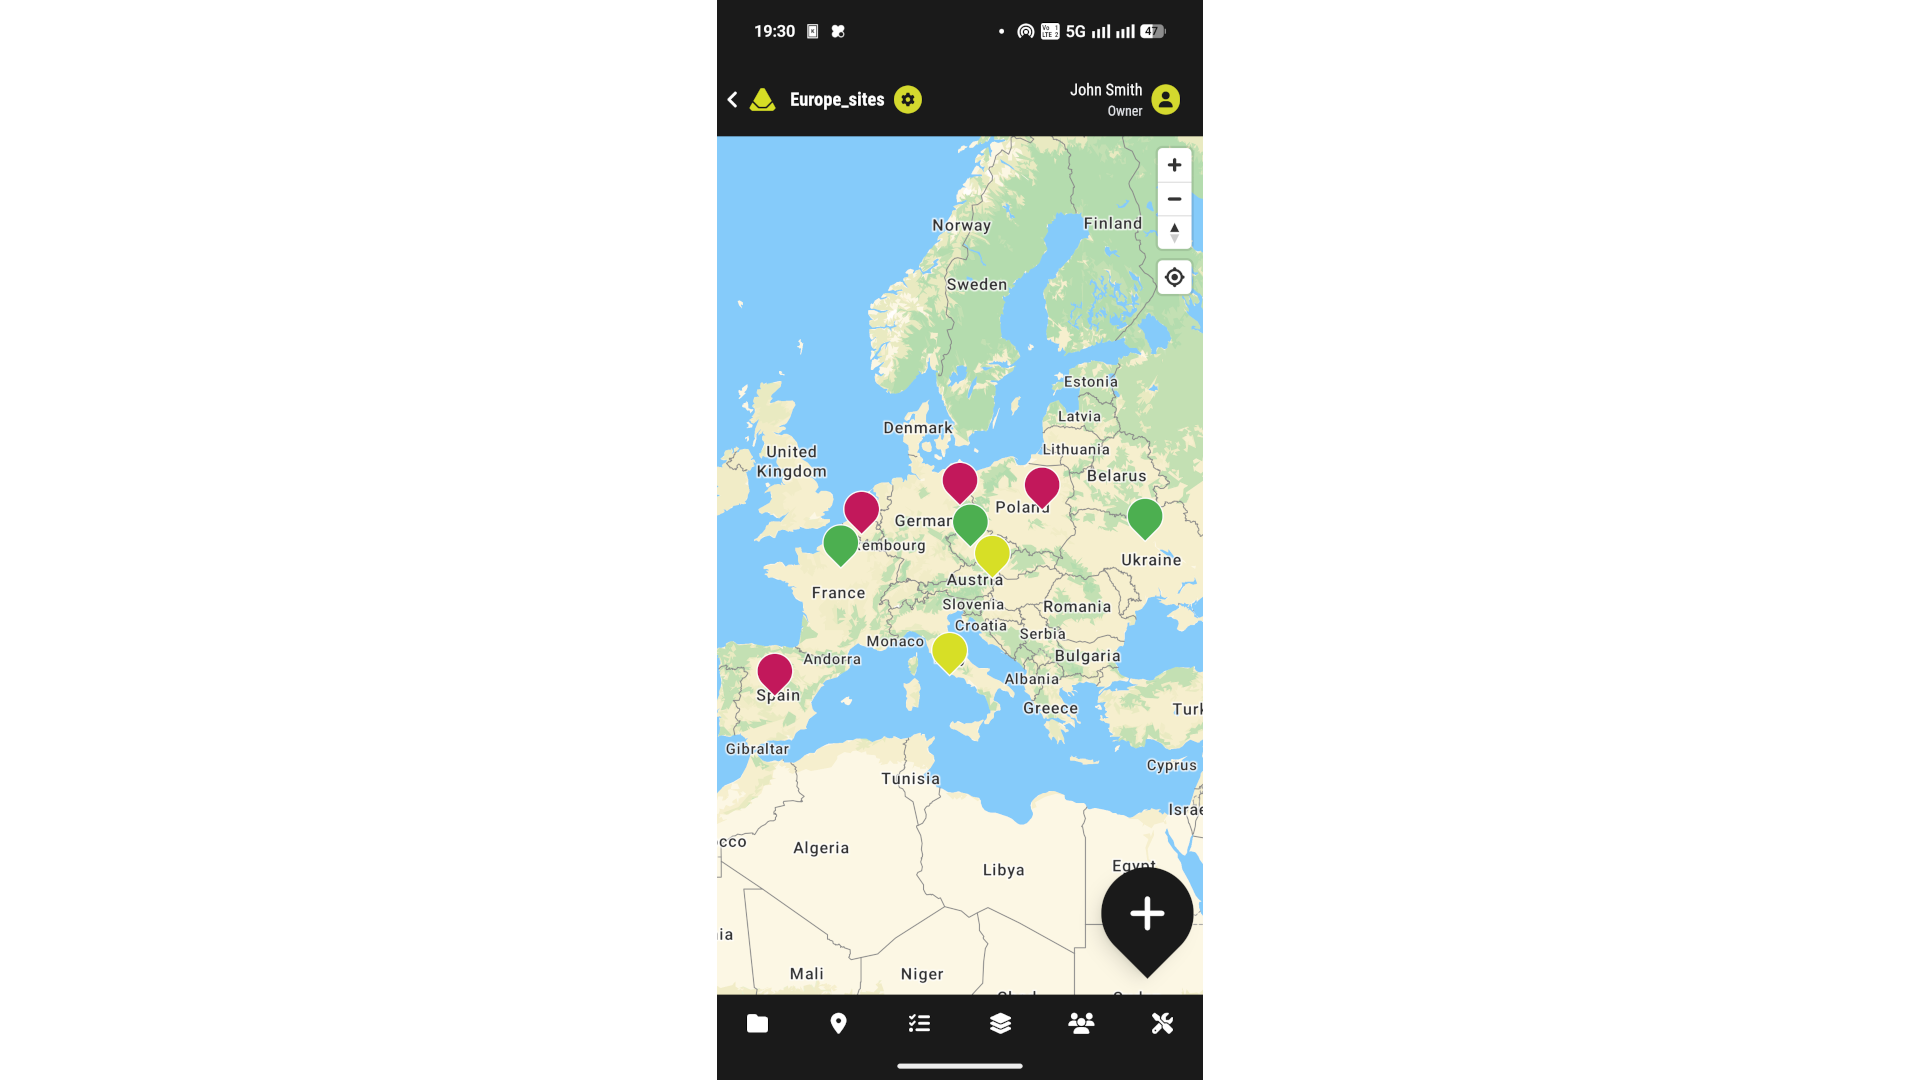
[Showcase of the mobile phone layout of a GeoWork project]
2.1. Global navigation bar
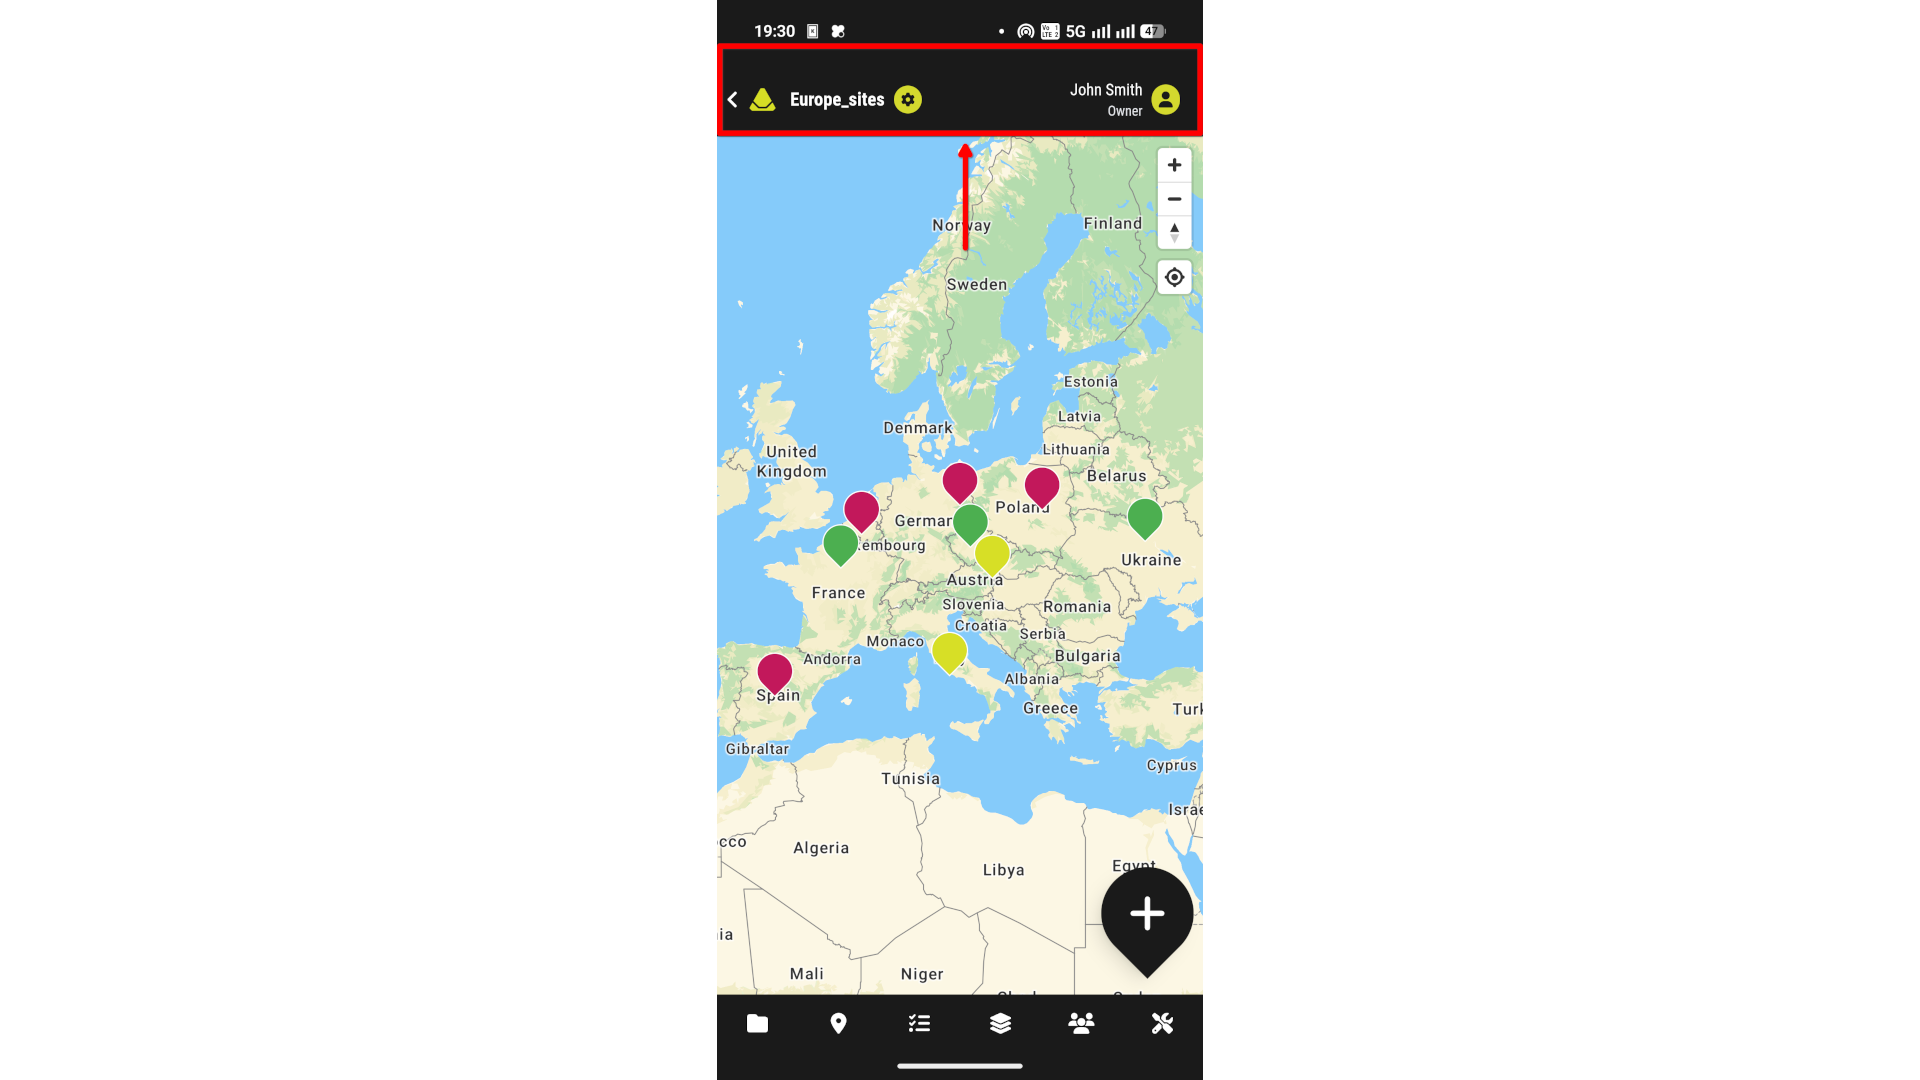
[Showcase of the Global navigation bar inside a project]
A navigation bar spans the full width of the screen at the top of the interface. This bar provides access to essential features that remain available regardless of where you are within the project.
On the far left side of the navigation bar, a left-pointing arrow is displayed. Selecting this arrow returns you to the dashboard. Next to the arrow, the project name and the Settings button are shown. Selecting the Settings button opens the project settings section.
On the right side of the navigation bar, your user profile is shown, including your user name, your profile picture and your assigned role within the specific project.
2.2. Project functions sidebar
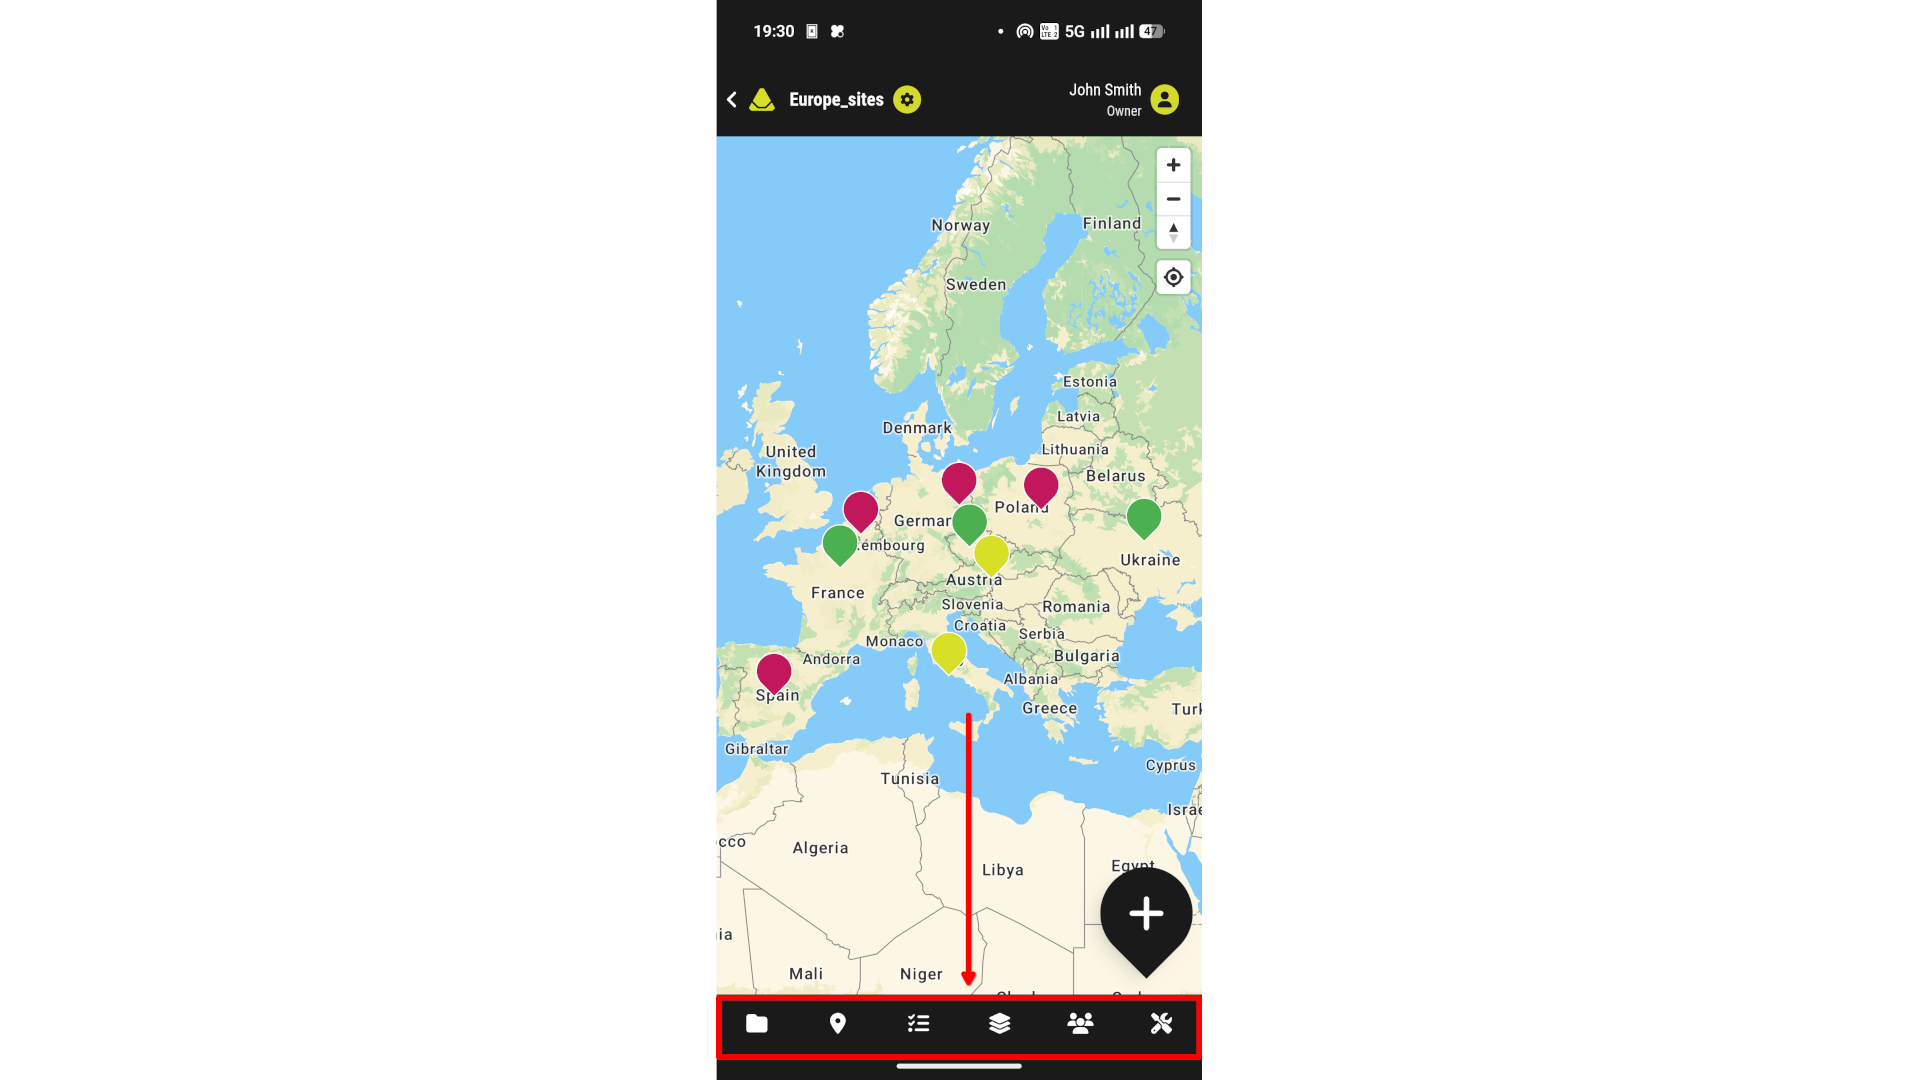
[Showcase of the Project functions sidebar inside a project]
On the bottom of your screen, a navigation panel containing multiple buttons is permanently displayed. These buttons include Project Info, Markers, Tasks, Layers, Members & Vehicles, and Tools.
When one of these buttons is selected, an adjacent full-screen panel opens, allowing you to interact with the corresponding feature category. Selecting the same feature category button again closes the full-screen panel and returns you to the map view.
By default, when a project is opened, the adjacent full-screen panel is not opened.
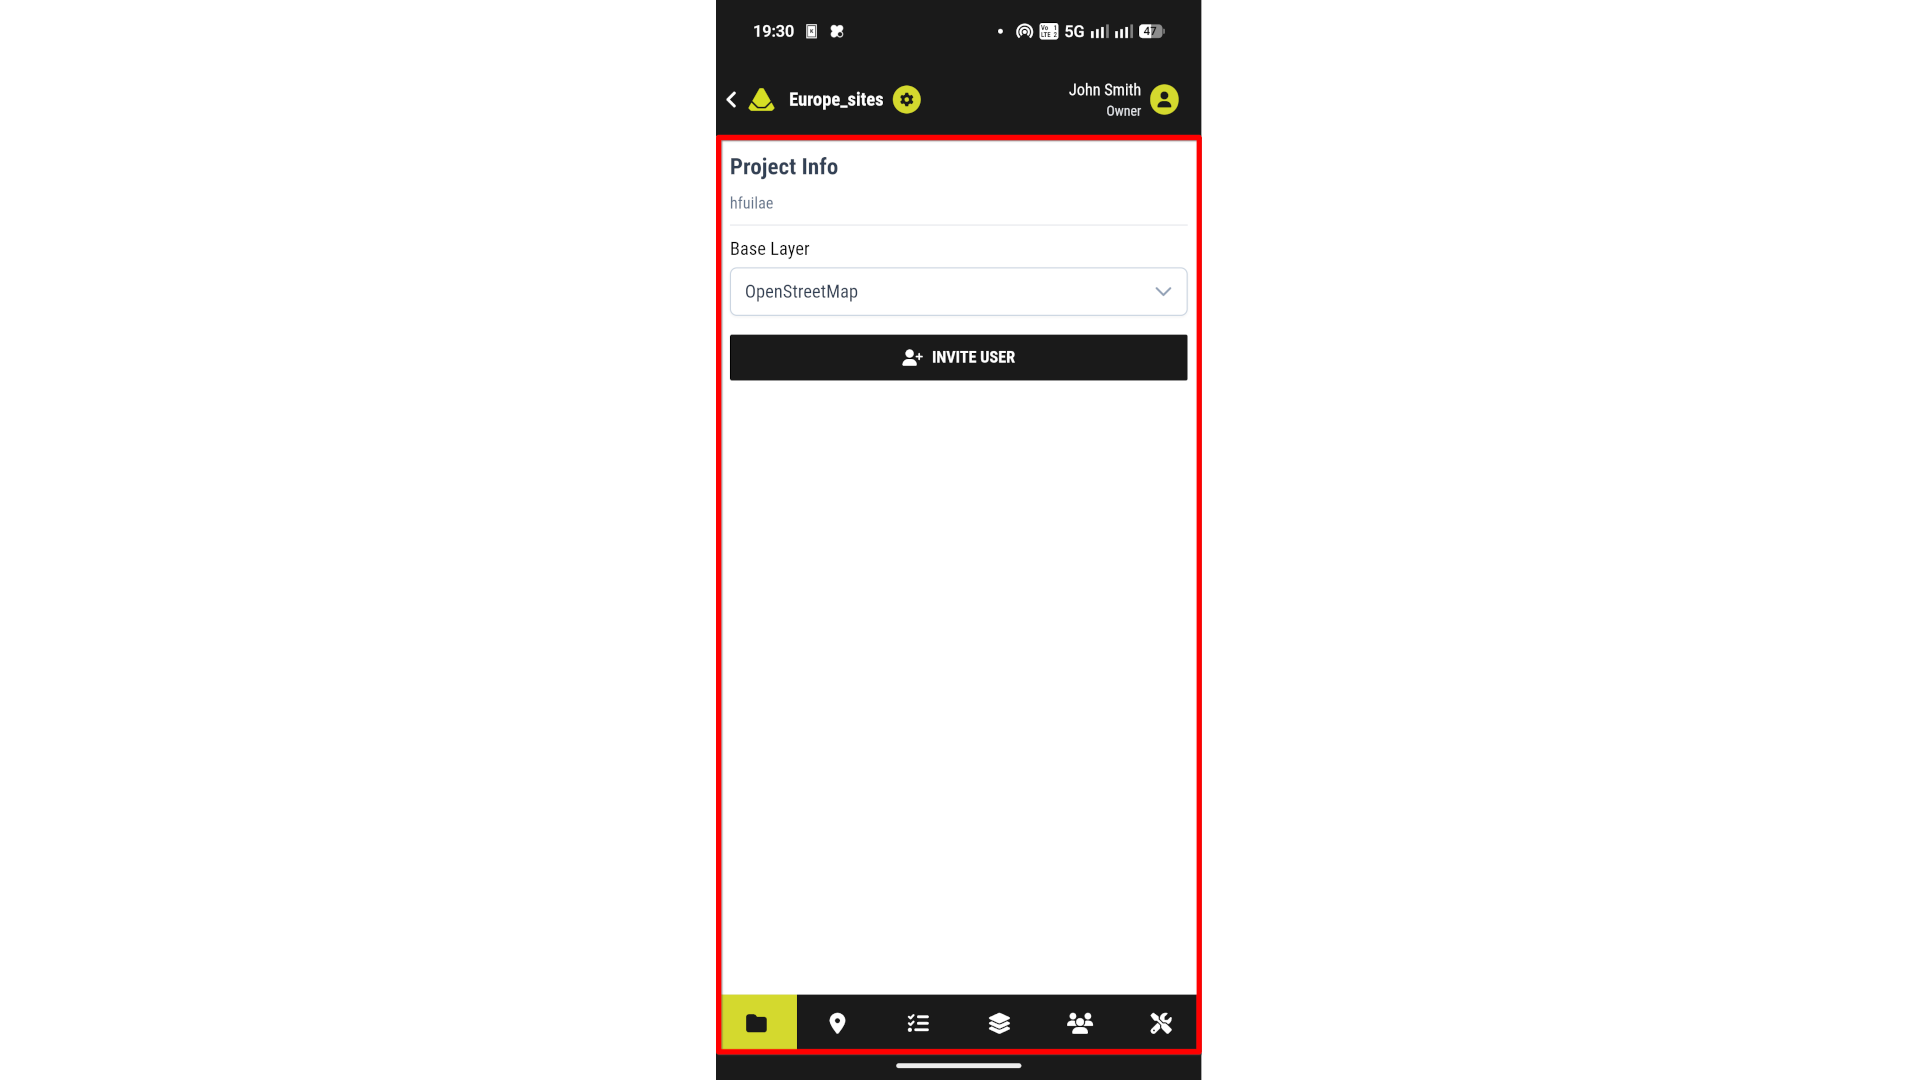
[Showcase of the adjacent full-screen panel, which opens by chosing a tab in the Project functions sidebar, inside a project]
2.3. Map control buttons
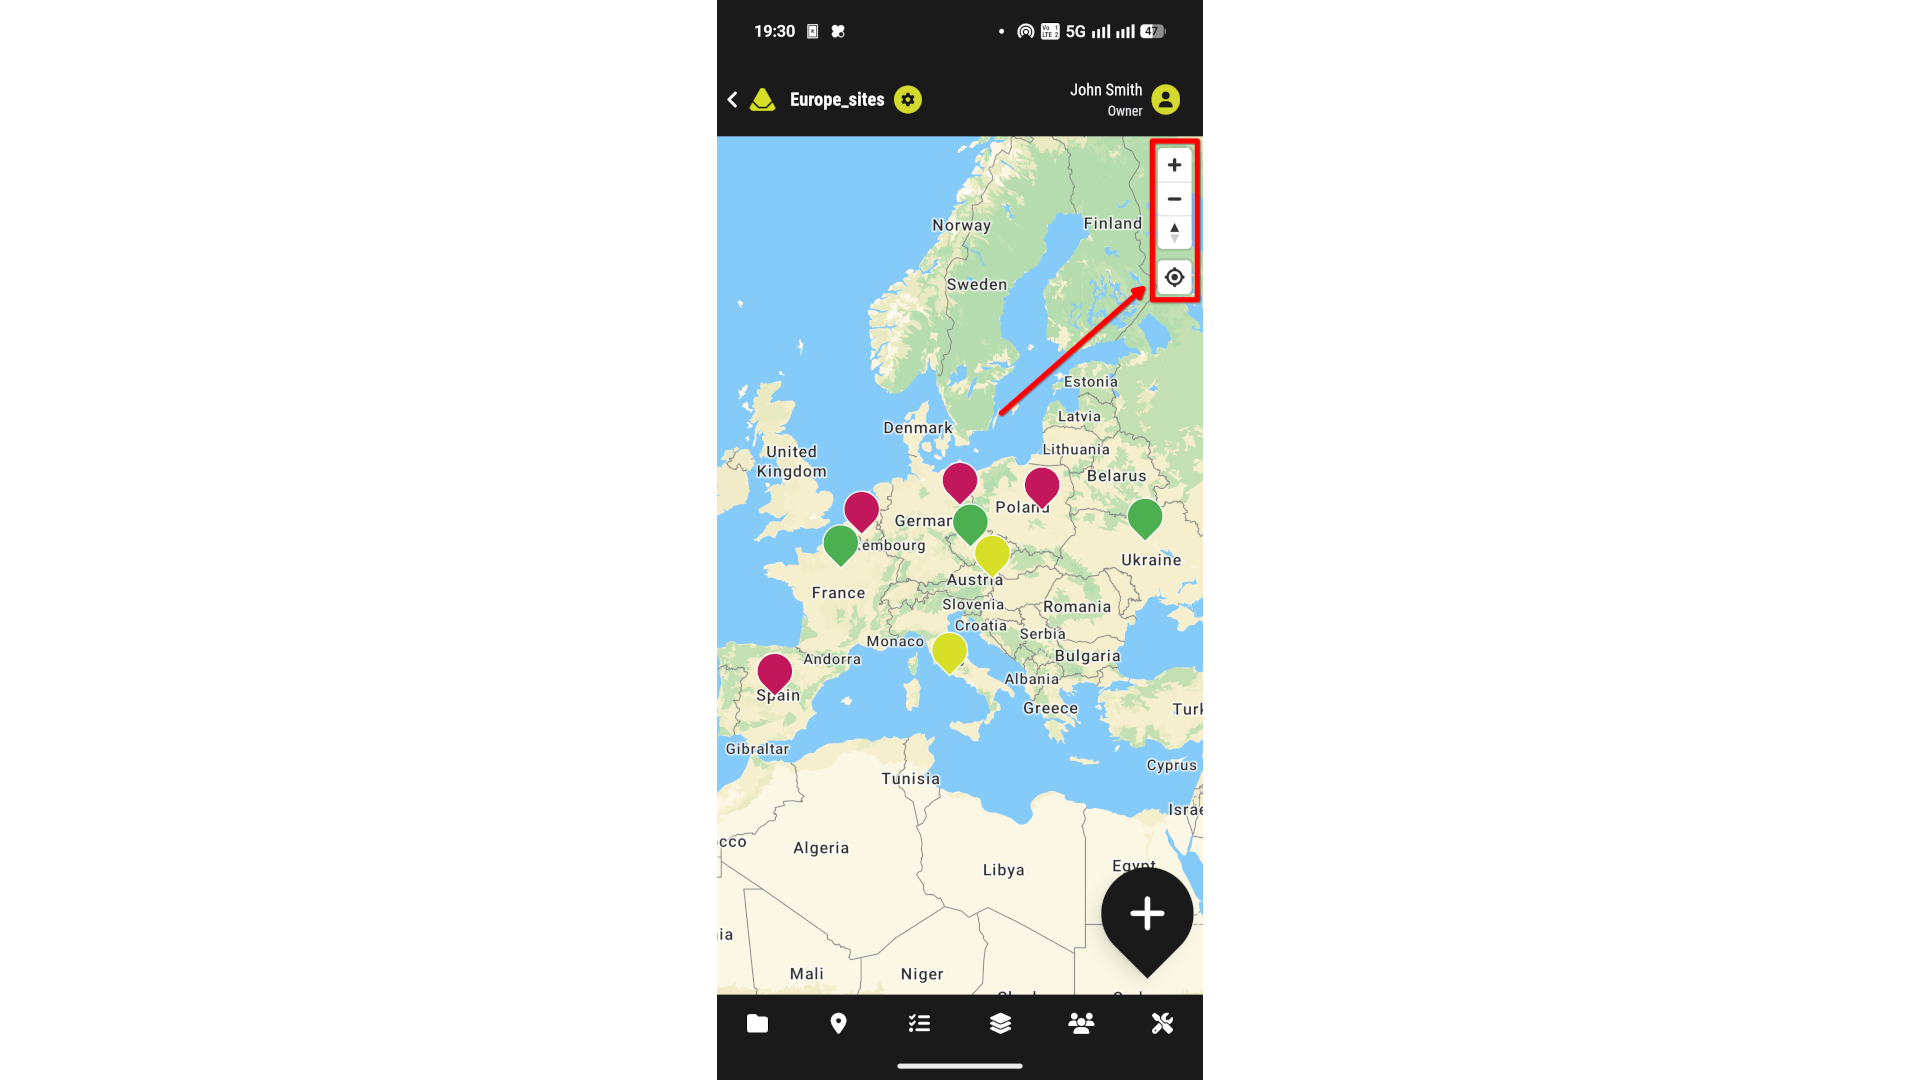
[Showcase of the Map control buttons inside a project]
In the top right corner, below the global navigation bar, four vertically aligned buttons are displayed. These buttons provide controls for interacting with the map.
The “+” and “–” buttons adjust the zoom level of the map view.
Below them, a compass icon indicates the direction of north, helping users maintain orientation regardless of how the map is rotated.
The lowest button centers the map on your current location.
2.4. Add marker button
In the bottom right corner of the screen, a “+” button is displayed. This button is used to add markers to the project. When selected, three options are displayed: Create marker from current location Create marker from gallery photo Create marker from camera Create marker from arbitrary position Each option creates a marker using a different method. For more detailed information, please refer to the Markers section.
In the bottom right corner of the screen, a “+” button is displayed. This button is used to add markers to the project. When selected, three options are displayed:
- Create Marker from Current Location
- Create Marker from Gallery Photo
- Create marker from Camera
- Create Marker from Arbitrary Position
Each option creates a marker using a different method. For more detailed information, please refer to the markers section.
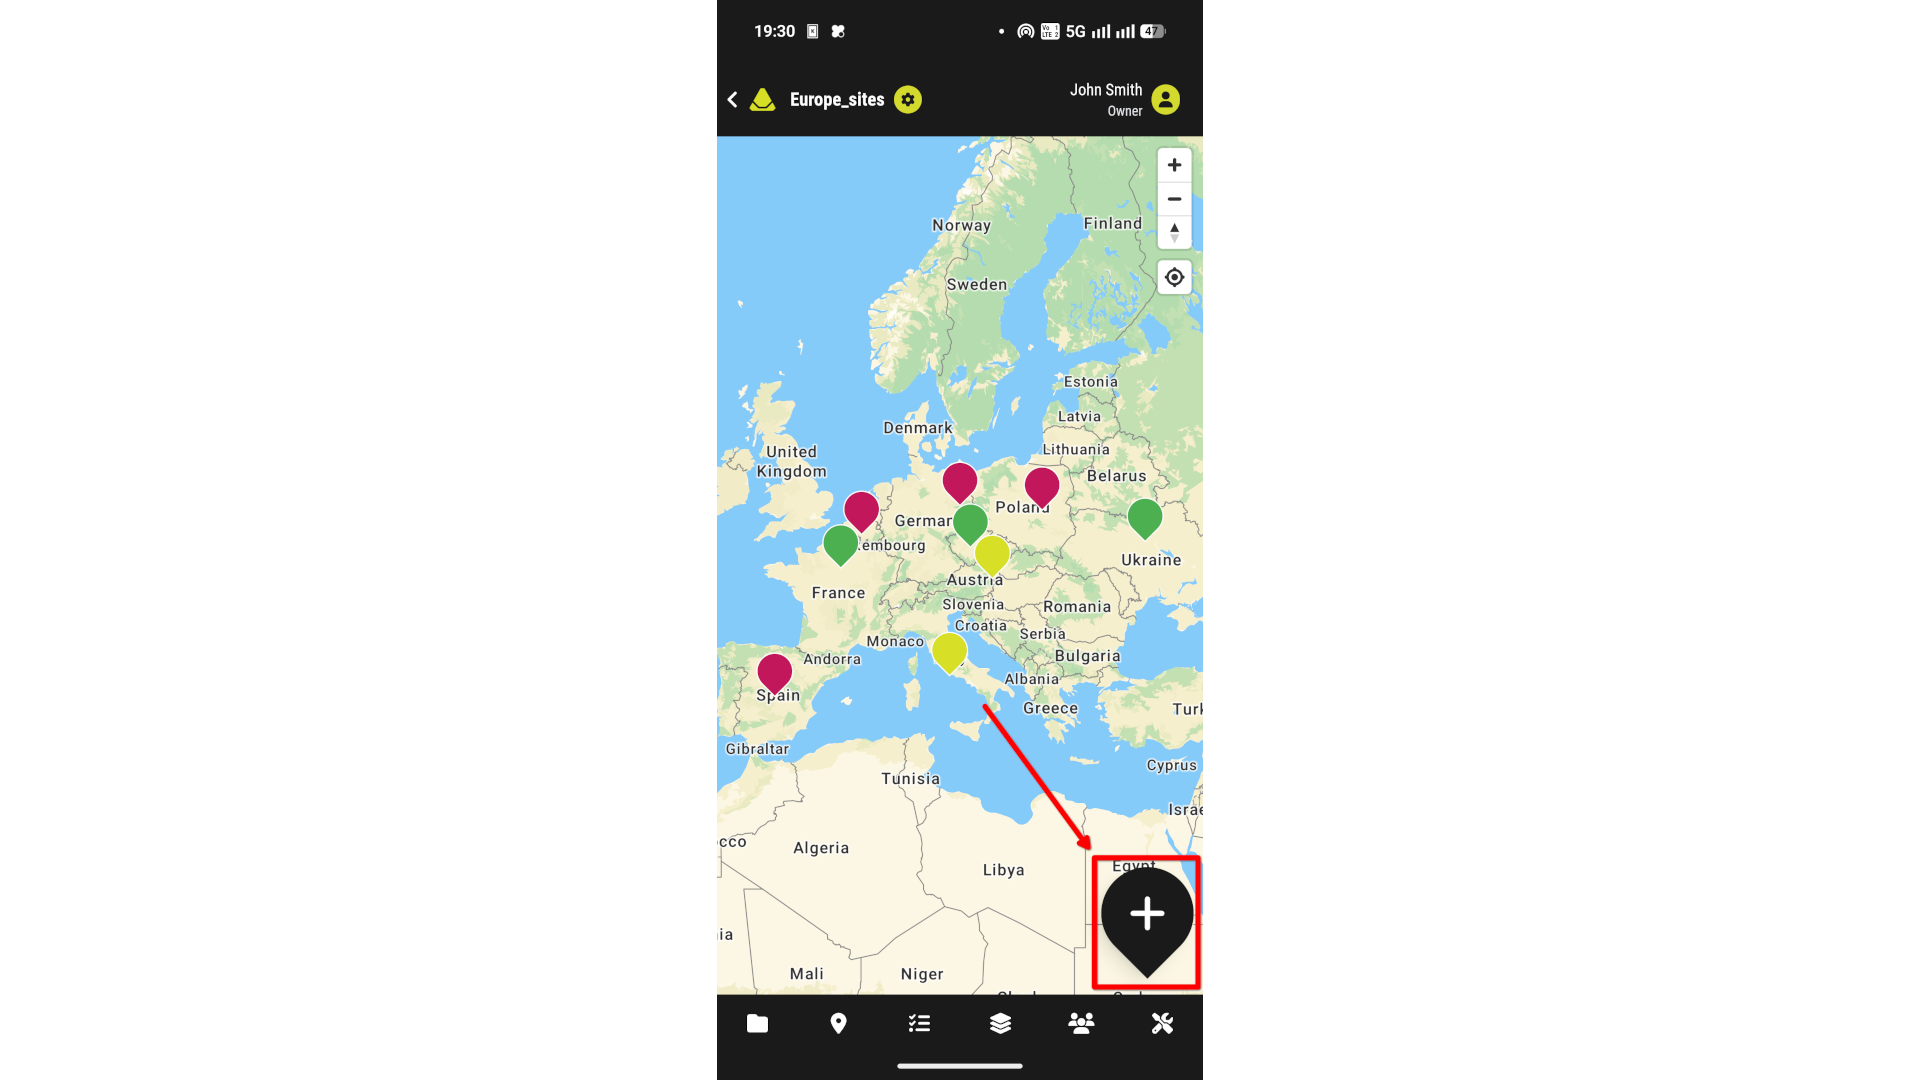
[Showcase of the Add marker button inside a project]