Tasks
This topic is too comprehensive to be covered as a subcategory. Therefore, a dedicated category is provided with detailed information about Tasks. This section describes only how to interact with Tasks within a project. Any summarized or unexplained parts include references to the corresponding topics in the Tasks category, where they are explained in detail.
Selecting the third button in the Project Functions sidebar opens the Tasks tab.
Tasks in GeoWork are a way to share information about who has to do what in which project. They are designed to simplify cooperation between users within a project (and to provide a clear overview of a user’s duties across all projects).
The Tasks tab in the Project Functions sidebar can be conceptually devided into two parts:
- New task button
- Tasks list
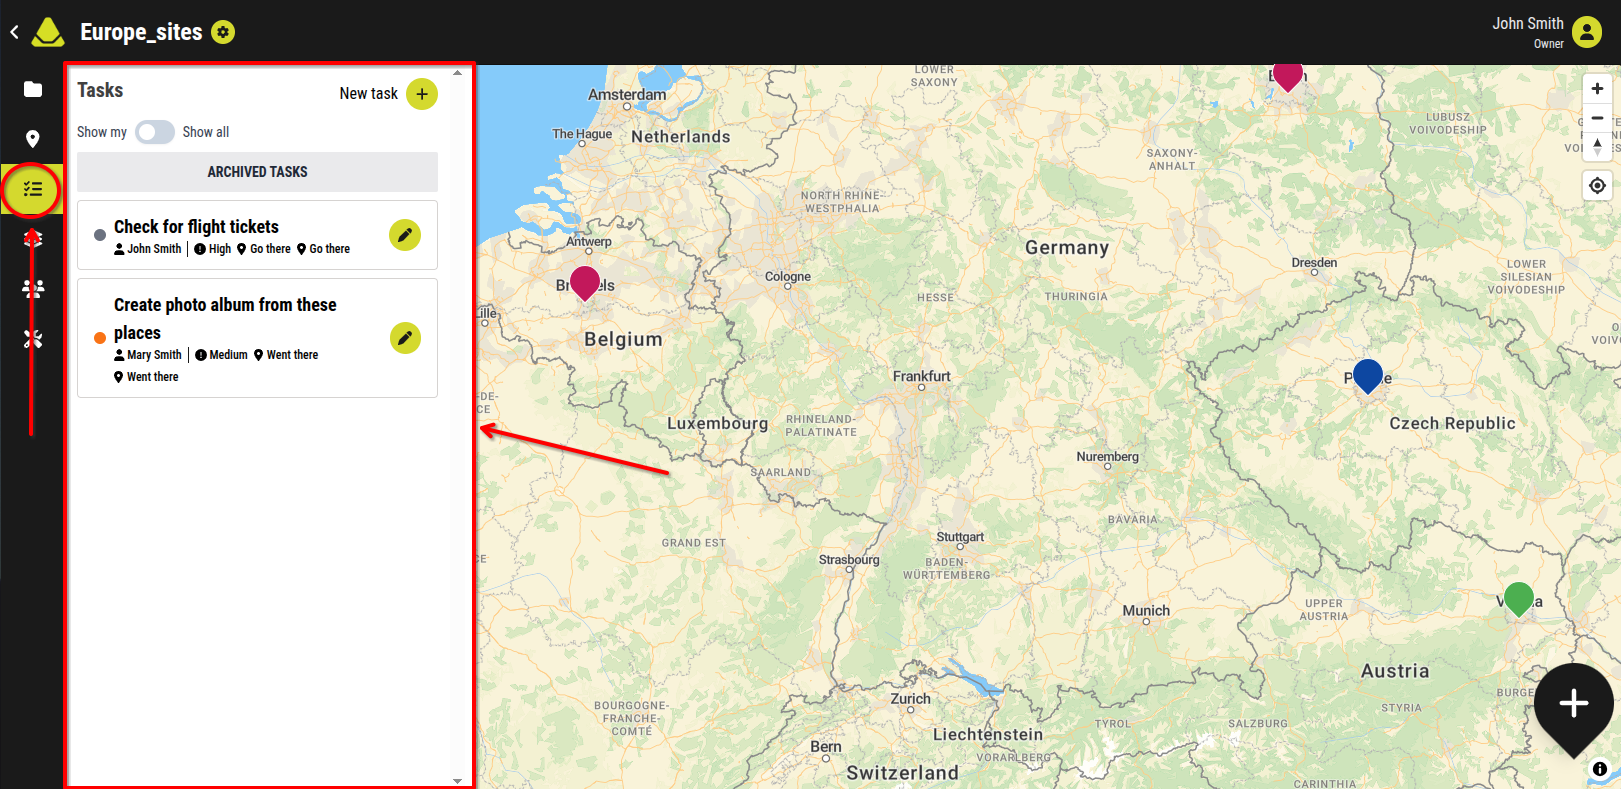
[Showcase of the Tasks tab]
1. New task button
This button is used to start the process of creating a new task.
When creating a task this way, it is automatically linked to the project in which the button was pressed. Unlike creating a task from the dashboard, there is no option to change the project.
Please refer to the Assign / Edit / Delete a task and Task details and properties sections of the Task category for information about the process of creating a new task.
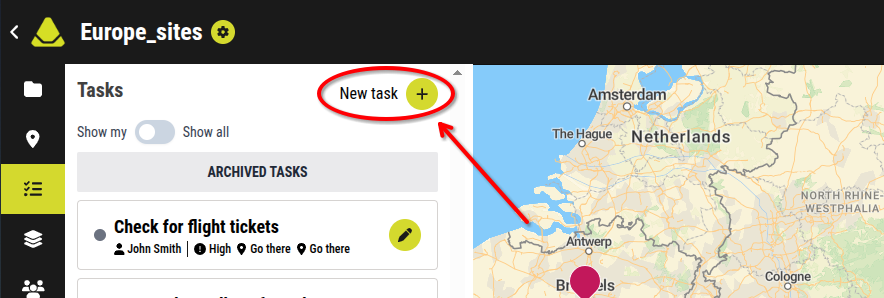
[Showcase of the New Task button]
2. Tasks list
The tasks list shows all tasks related to the currently opened project. This includes tasks created directly within the project or tasks linked to it from the dashboard. Tasks in the list may be assigned to any user in the project and may be linked to any markers within the project.
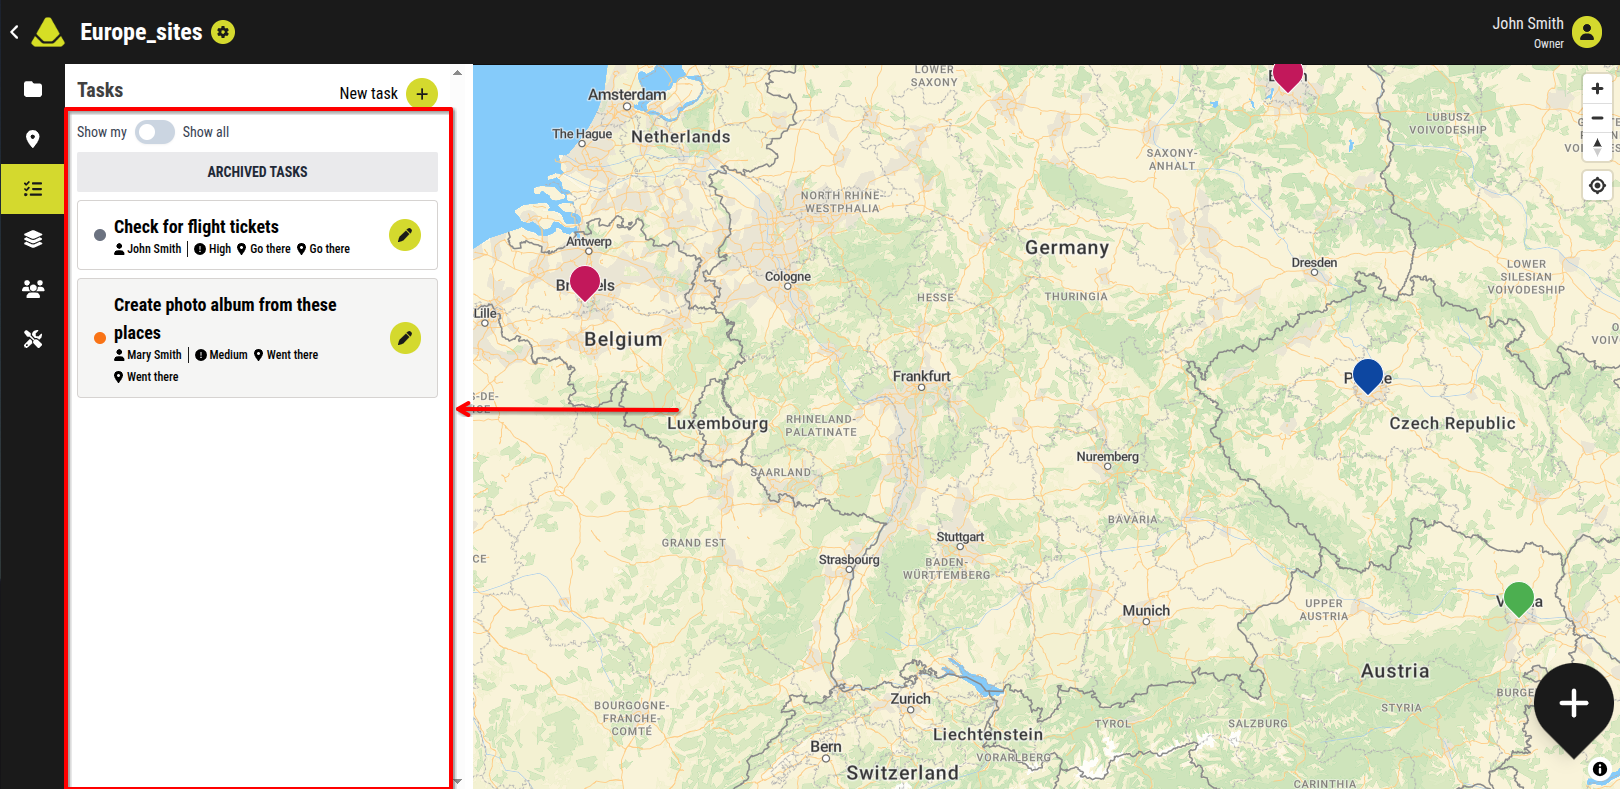
[Showcase of the tasks list]
The list is made of boxes, with each box representing one task. Each box contains:
- The task's status
- The task's title
- The user to which the task was assigned
- The task's priority
- The related resource
- An Edit button
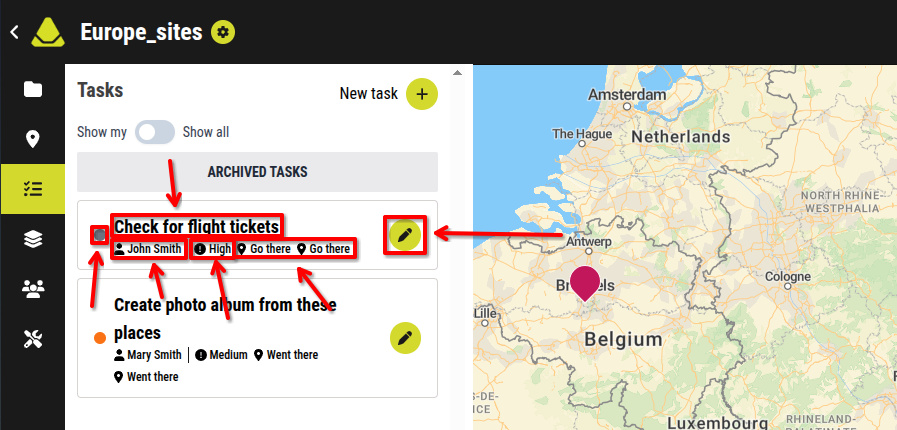
[Showcase of each subpart of the tasks list]
2.1. Select task
Clicking on a task in the list opens an interface to view and interact with the selected task.
The UI contains:
-
The task's title
-
The task's priority
-
Items from the checklist
- each item contains chekboxes to mark them as done
(if contained in within the task)
-
The vehicles assigned to the task
(if contained in within the task)
-
The related resource
- clicking on any of them redirects towards the markers UI
(if contained in within the task)
-
The tasks' Geometry
(if contained in within the task)
-
(if contained in within the task)
-
The Start Task / Pause Task / Resume Task / Finish Task buttons
- changes the tasks' status
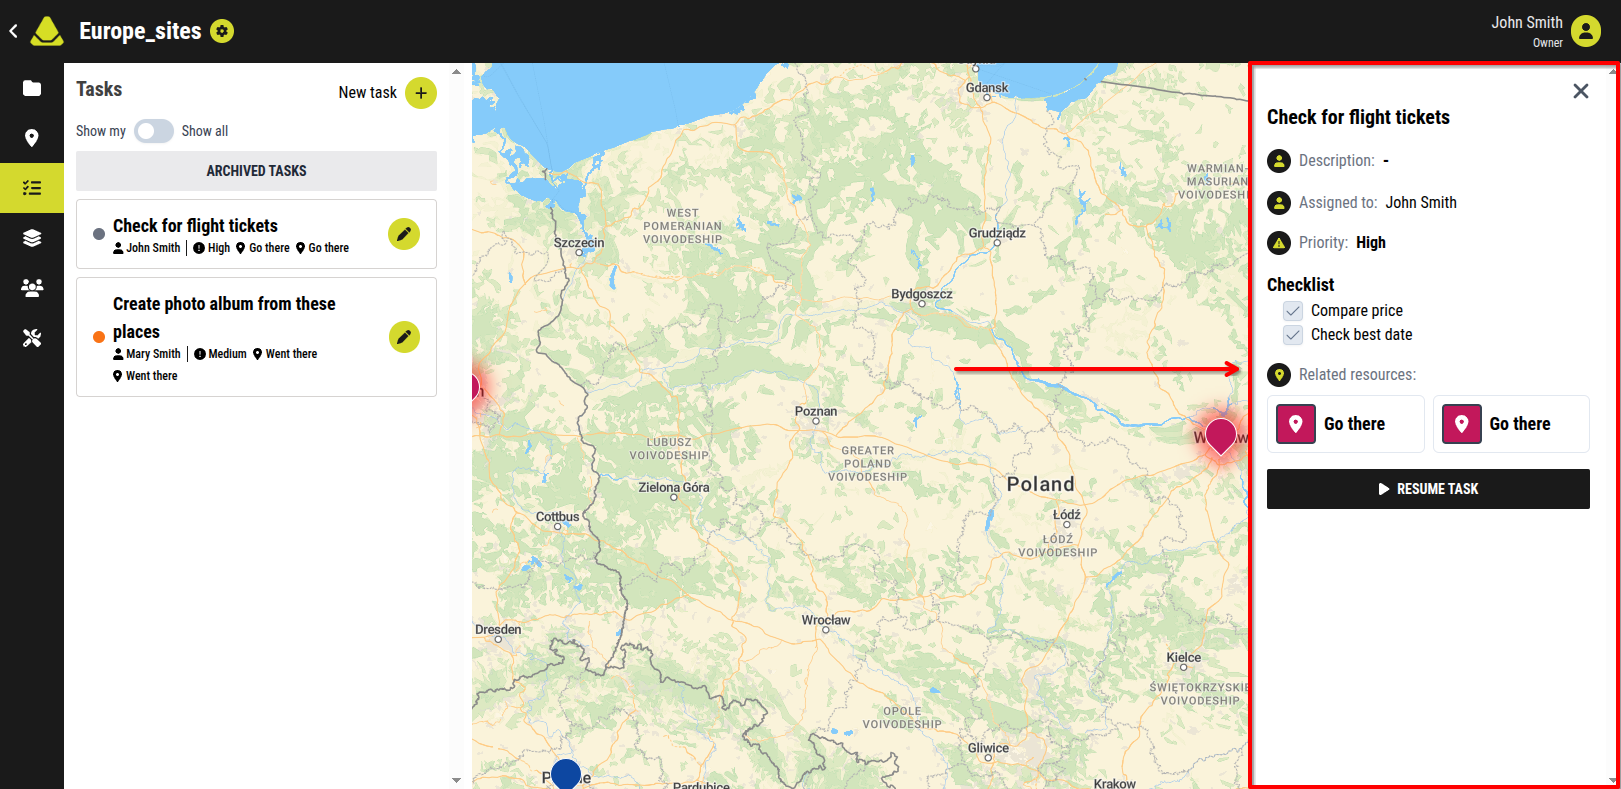
[An example of a selected task]
2.2. Edit a task
Clicking on the Edit button next to a task in the tasks list opens up a UI for the process of a editing task.
Please refer to the Assign / Edit / Delete a task and Task details and properties sections of the Task category for information about the process of editing a task.
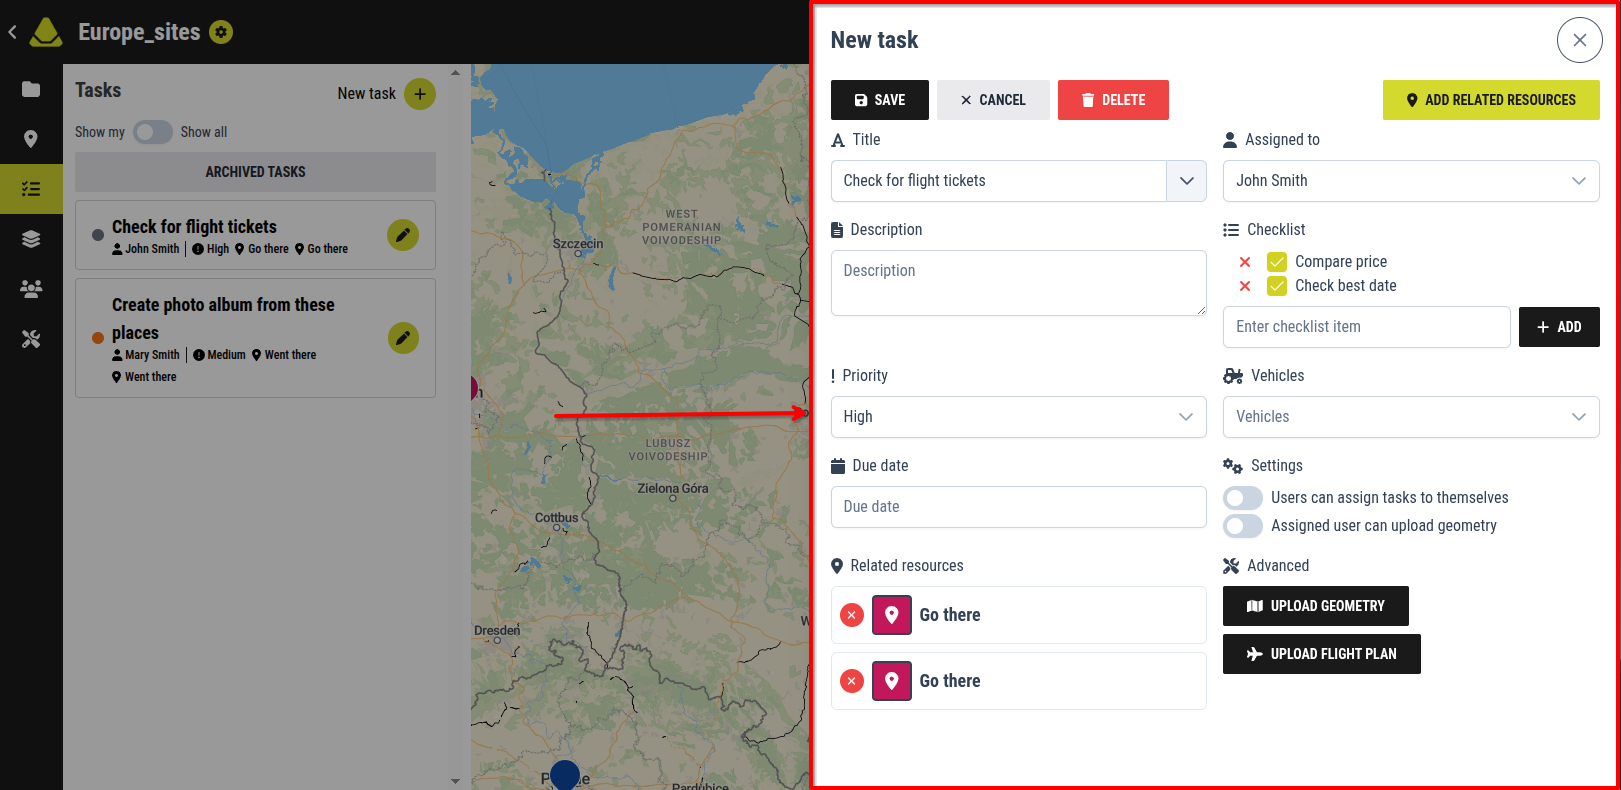
[Showcase of the Edit Task button]
2.3. Show switch
Above the tasks list is a switch with two options:
- Show my
- Show all
Toggling this switch changes whether the tasks list displays only tasks linked to your account or all tasks within the project.
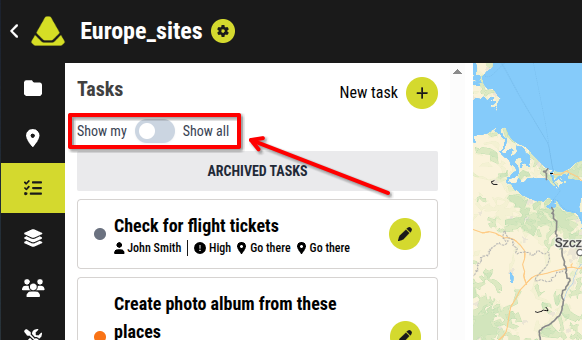
[Showcase of the switch that alters the Tasks list]
2.4. Archived tasks
Above the tasks list and below the Show switch is the Archived tasks button. Pressing this button opens a UI displaying all the archived tasks of the project.
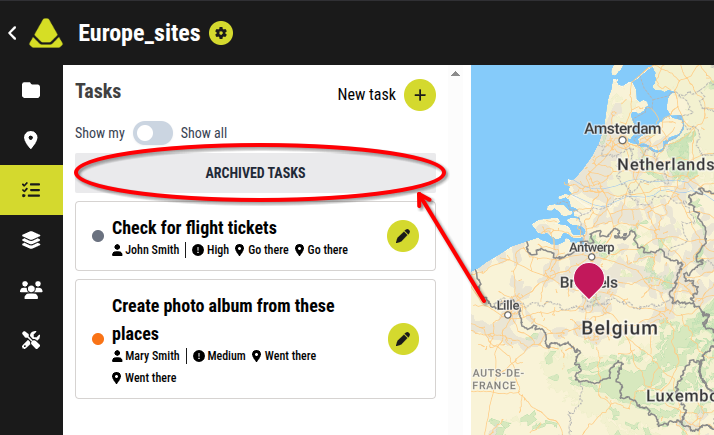
[Showcase of the Archived tasks button]