Marker states
This page only explains the management of marker states from the project settings. To better understand the wider concept and to get more details, please visit the marker states section.
Scrolling to the second category, or clicking the corresponding button in the project settings navigation bar, opens the Marker states section.
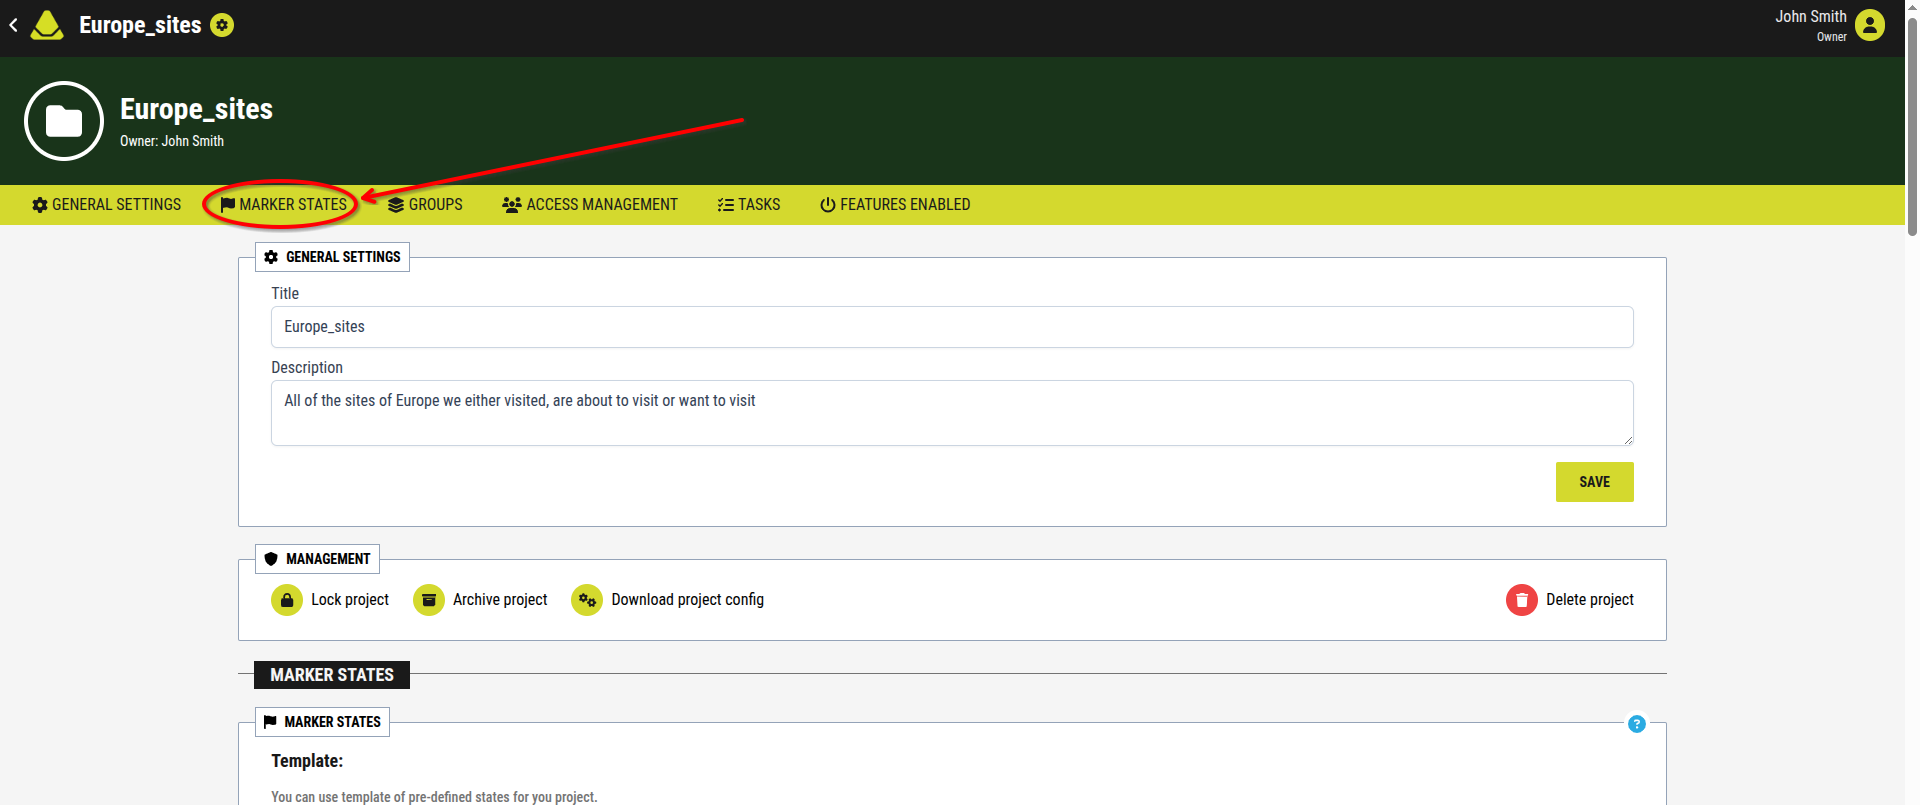
[Showcase of the Marker states category button in the project settings]
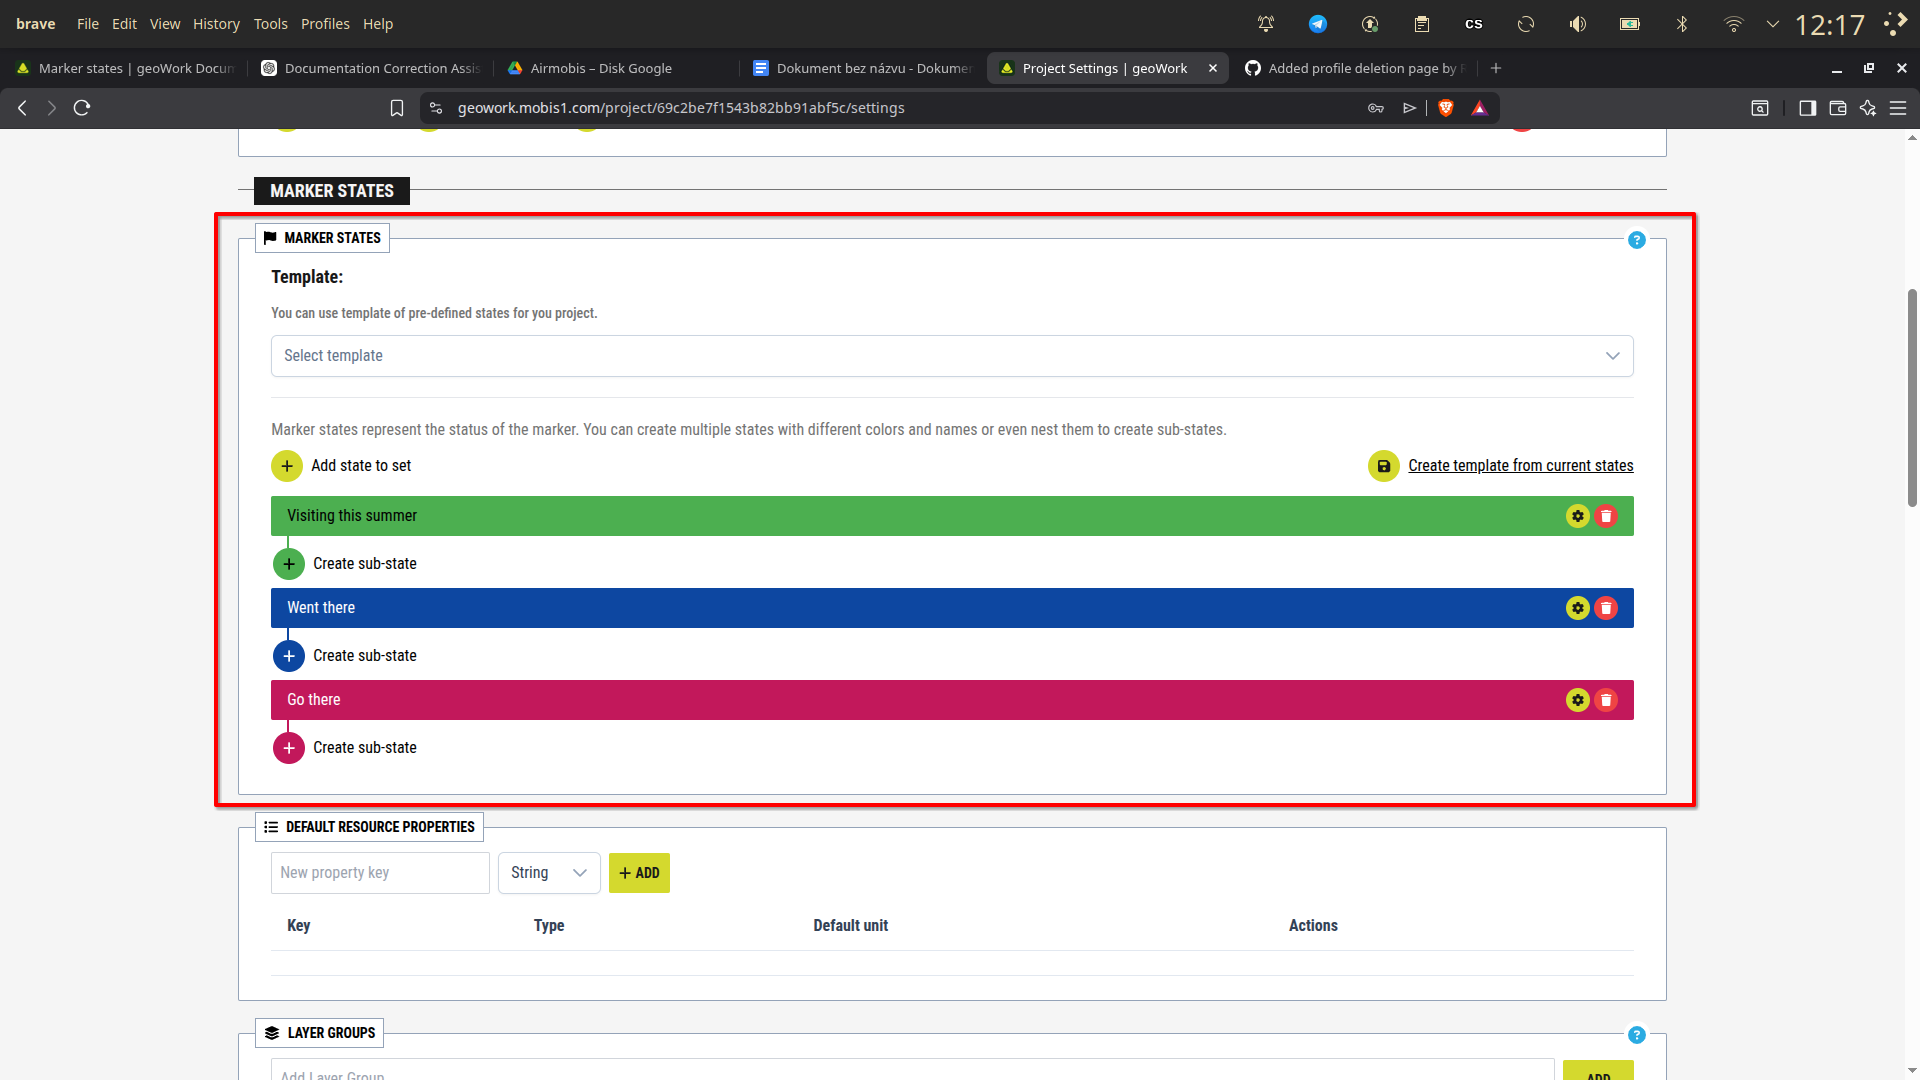
[Showcase of the Marker states page in the project settings]
The Marker states section is used to manage marker states and default resource properties. It is divided into two subsections:
1. Marker states
This subsection is used to manage all marker states and sub-states within a specific project. Changes made here apply only to the current project.
[Showcase of the Marker states section in the project settings]
1.1. Templates
This part allows you to apply predefined marker state templates to the project.
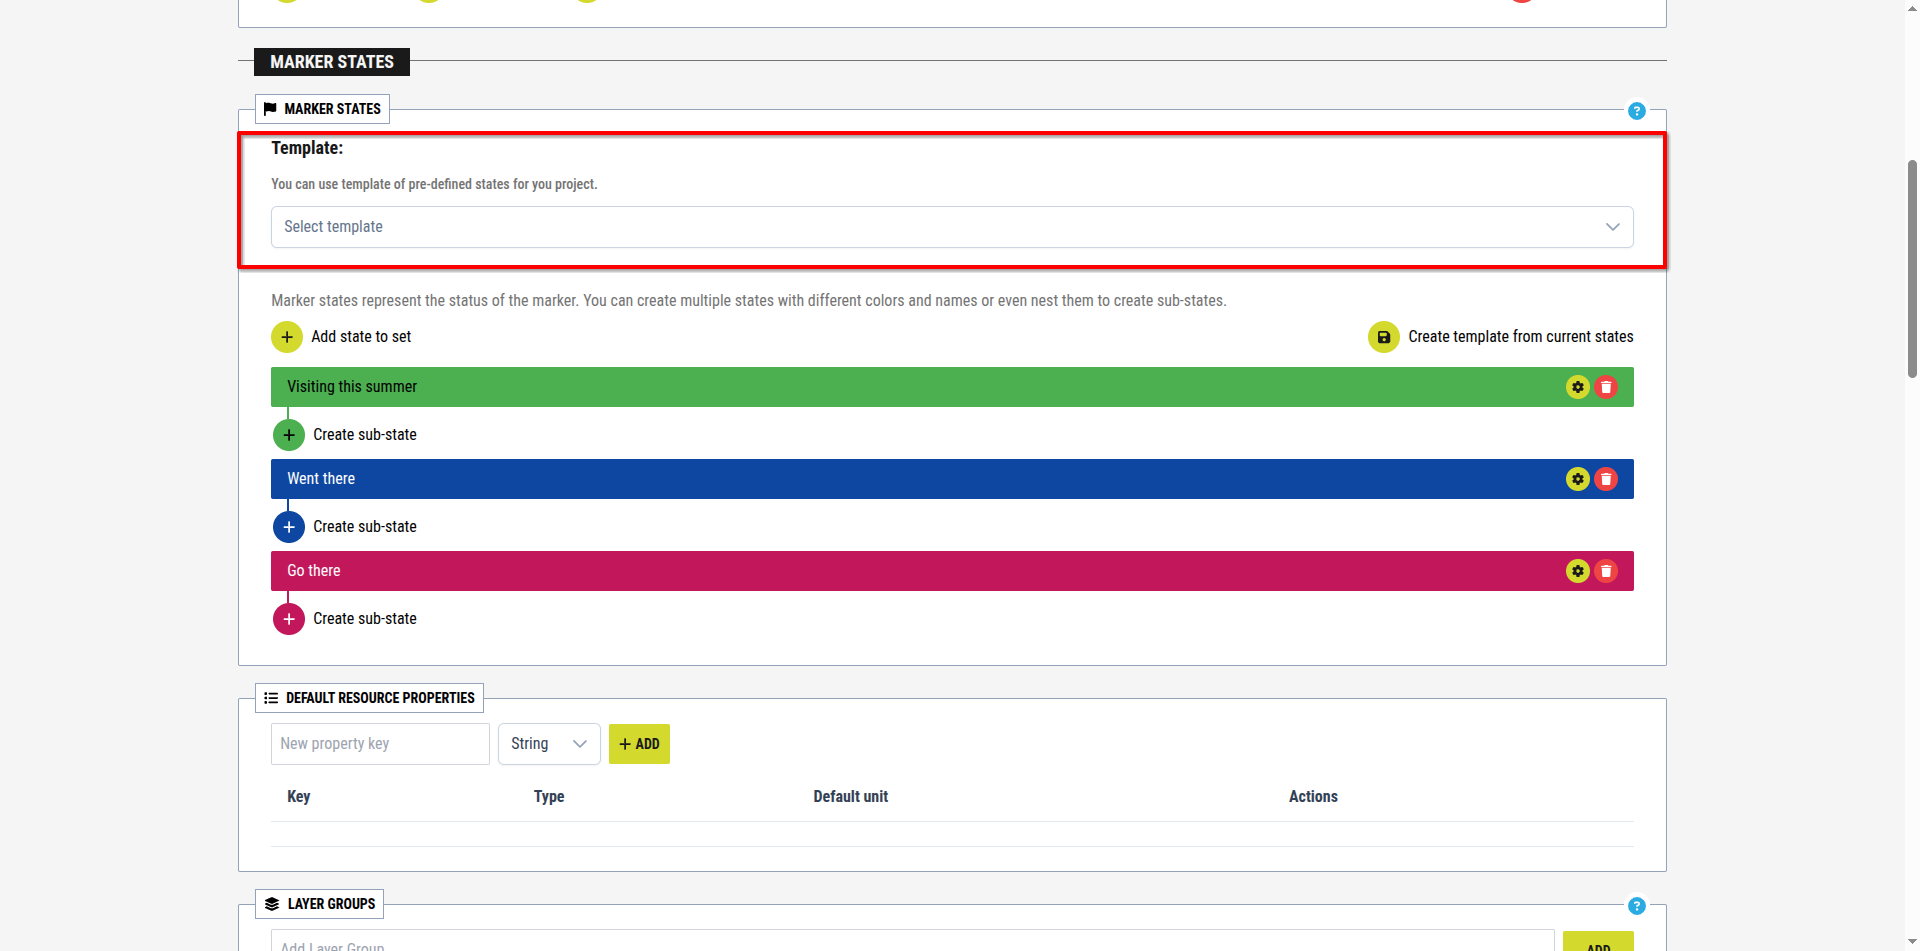
[Showcase of the Template section of the Marker states section in the project settings]
To apply a template:
1. Click the Template option dropdown box
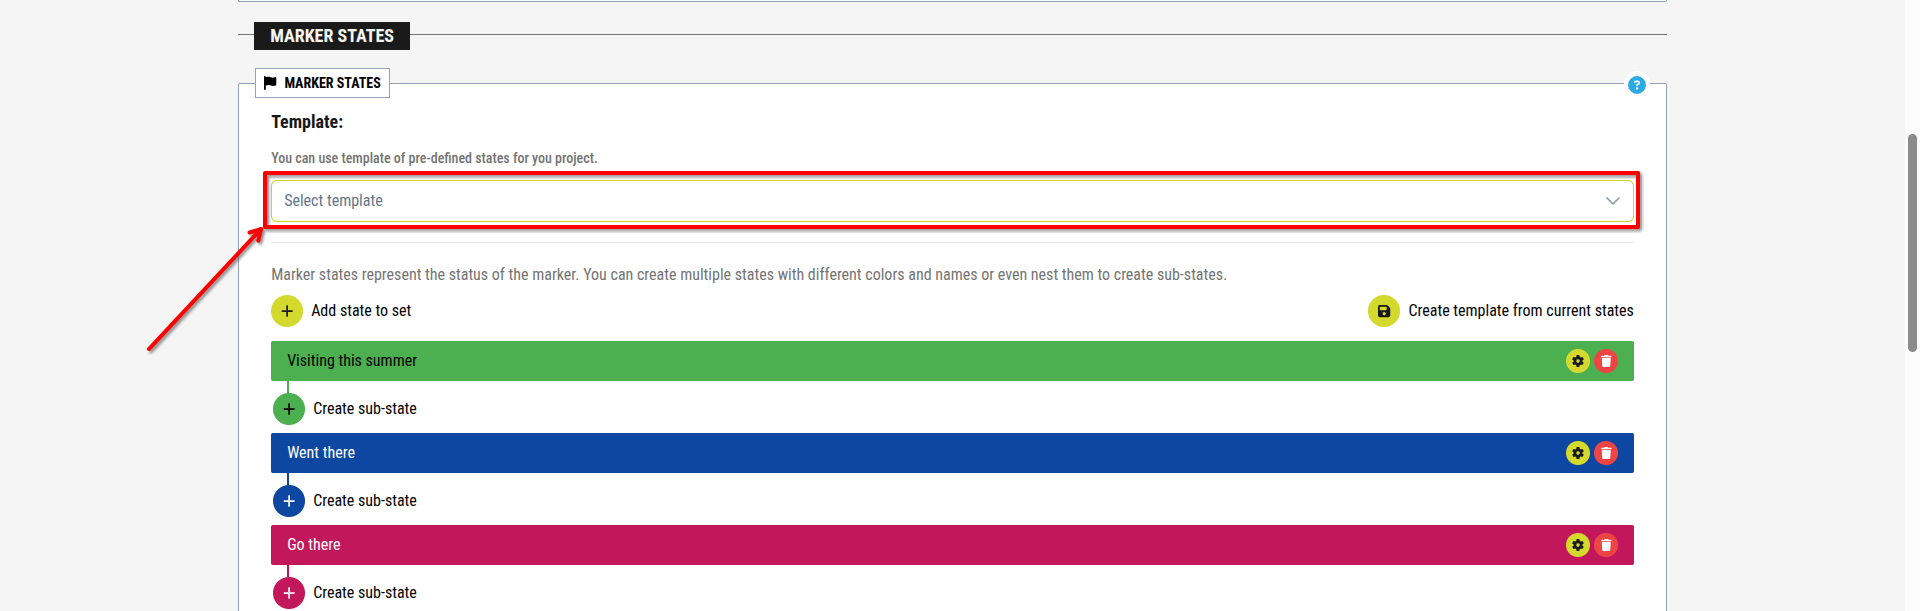
[Image for step 1]
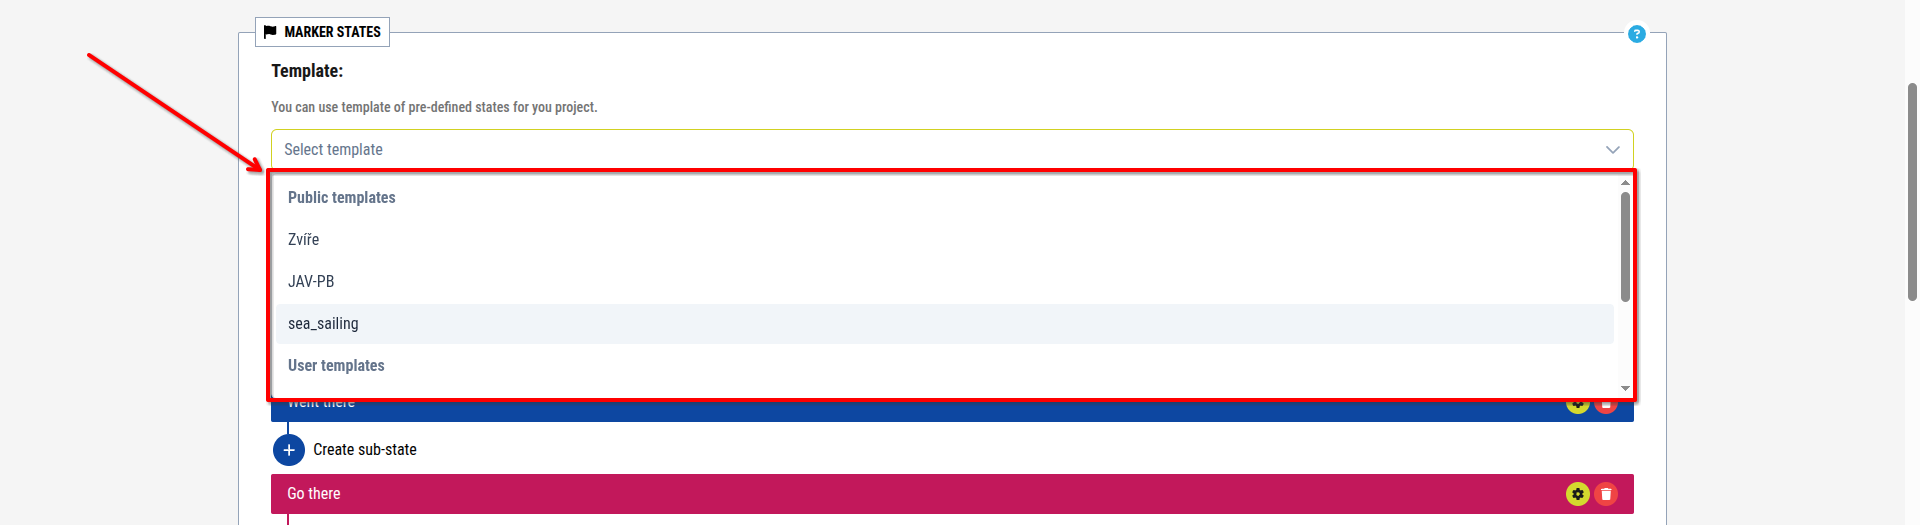
2. Select a marker state template from the displayed list
[Image for step 2]
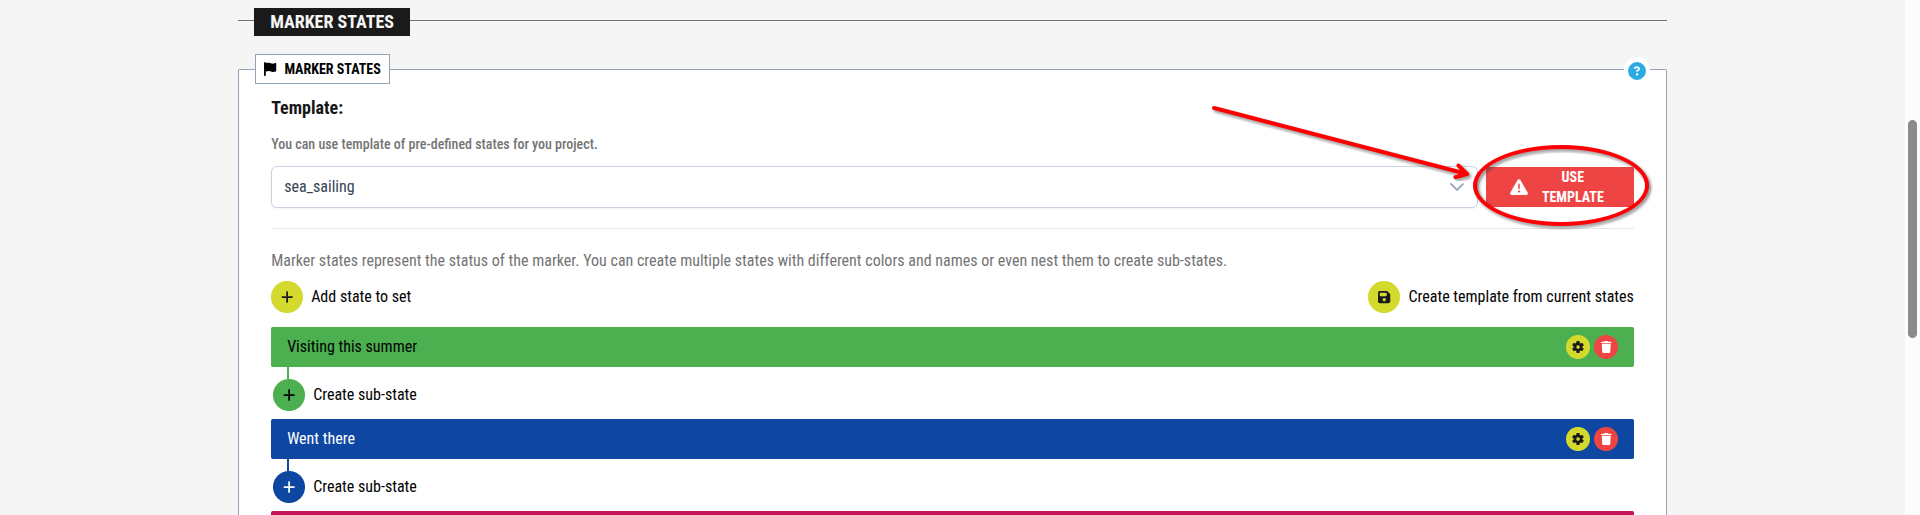
3. Click the Use Template button
[Image for step 3]
1.2. Manual marker state management
[Showcase of the Manual marker state management in the Marker states project settings]
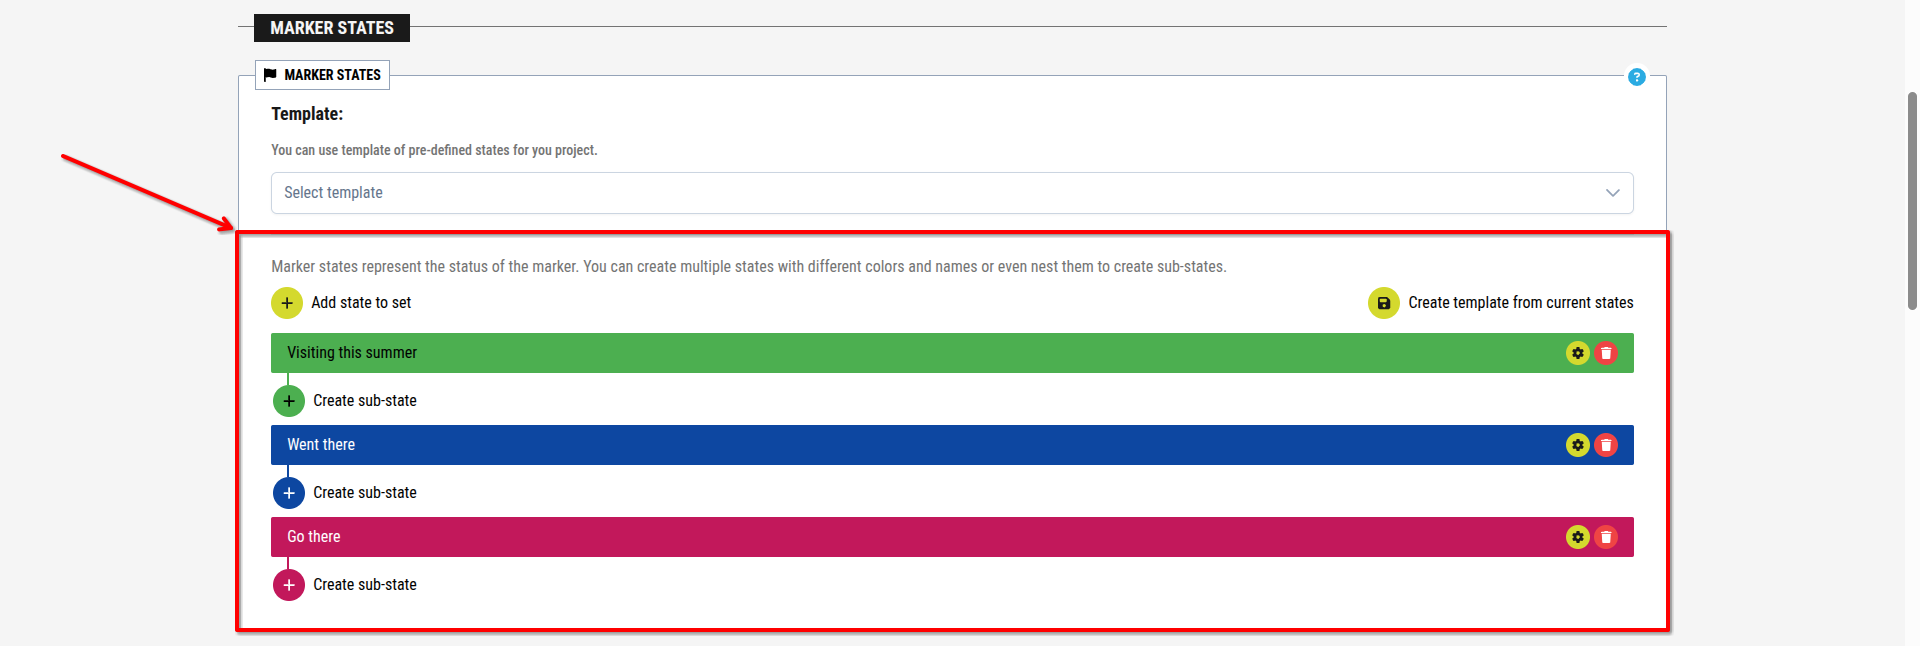
Below the Templates section is a visual structure representing all current states and sub-states existing inside the project. It consists of boxes:
- Each box represents a state or sub-state
- Indented positioning and connecting lines indicate hierarchy (parent–child relationships)
- A state placed under another is its sub-state
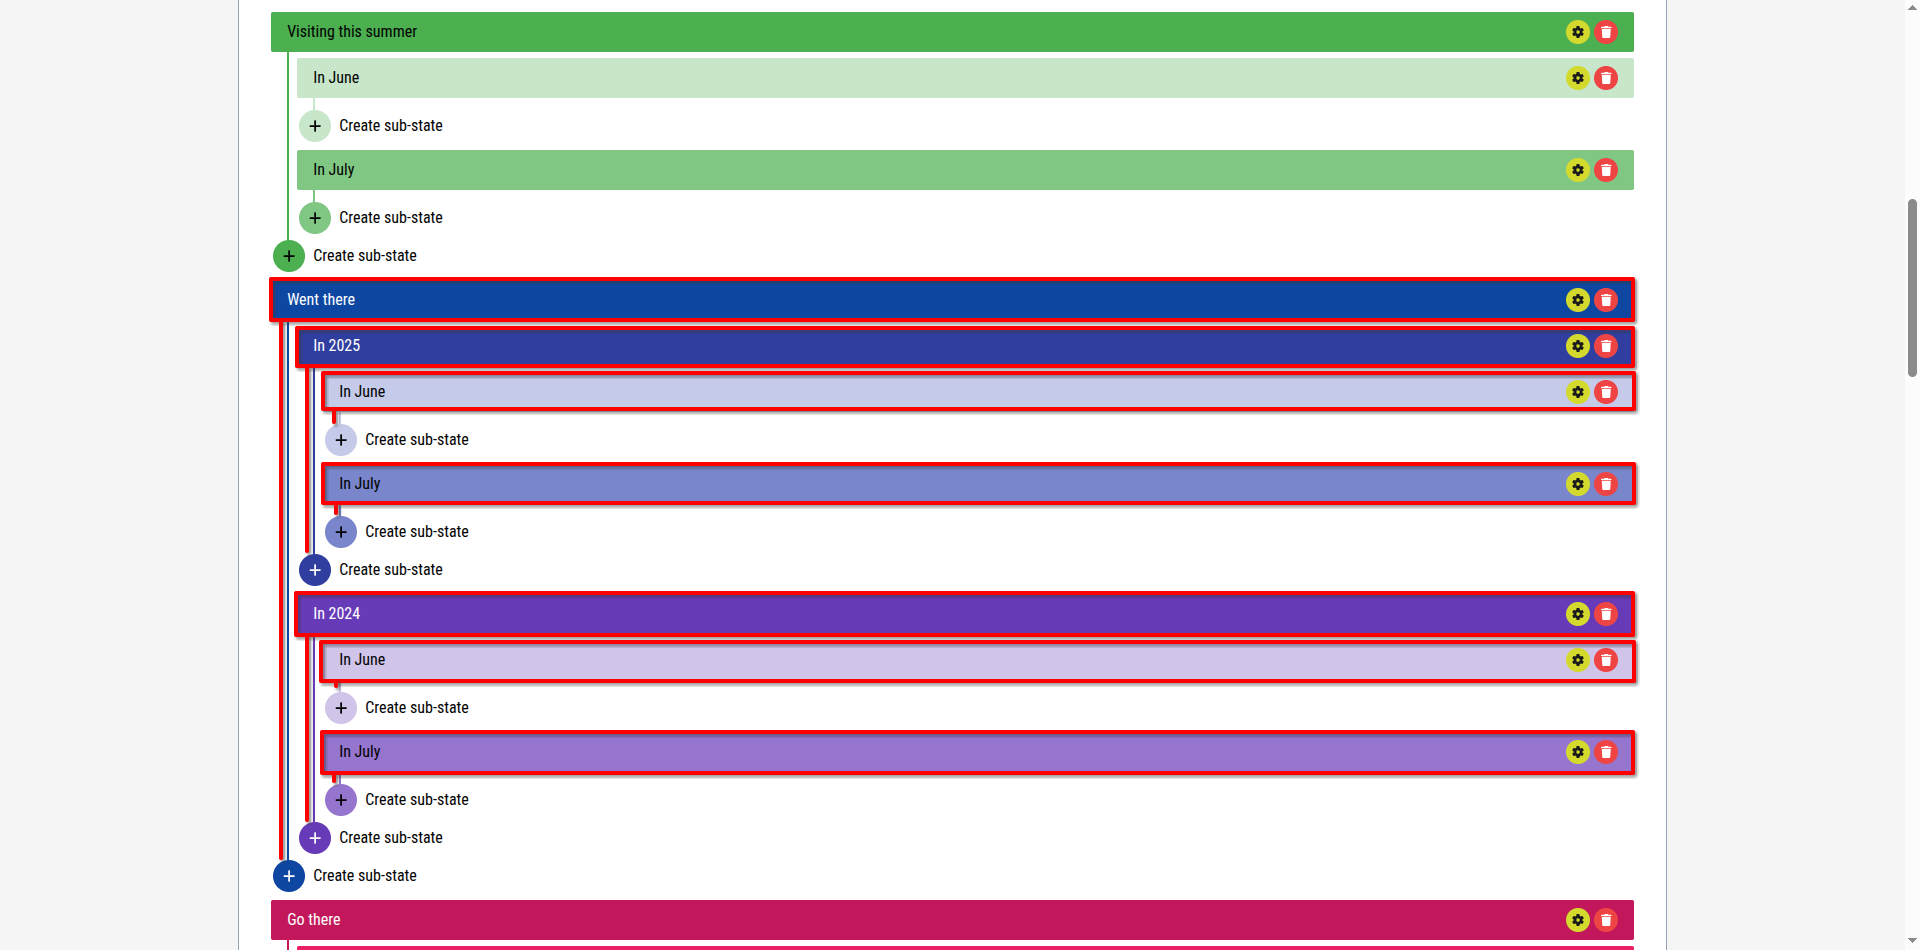
[Showcase of how the hierarchy lines indicate the relations between the state boxes]
Each state box includes:
- The state name
- A Settings button (edit)
- A Delete button
- A Create sub-state button (adds a child state)
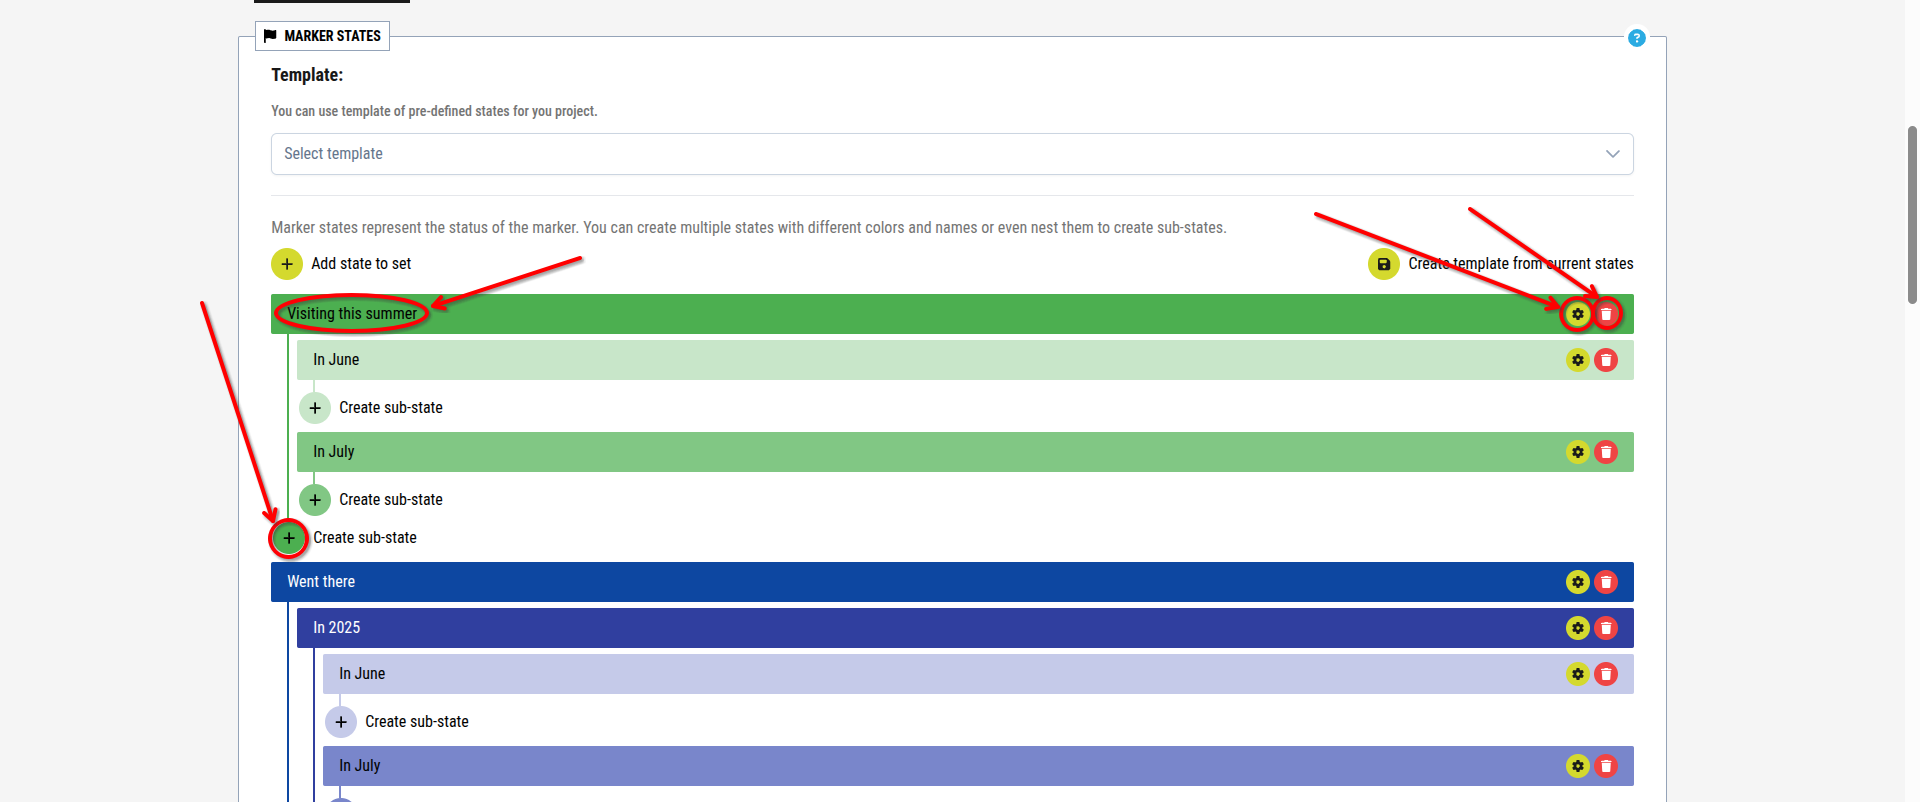
[Showcase of the individual parts of the state boxes]
At the top of this section are two buttons:
- Add state to set (top-left): creates a new top-level state
- Create template from current states (top-right): saves the current structure as a reusable template
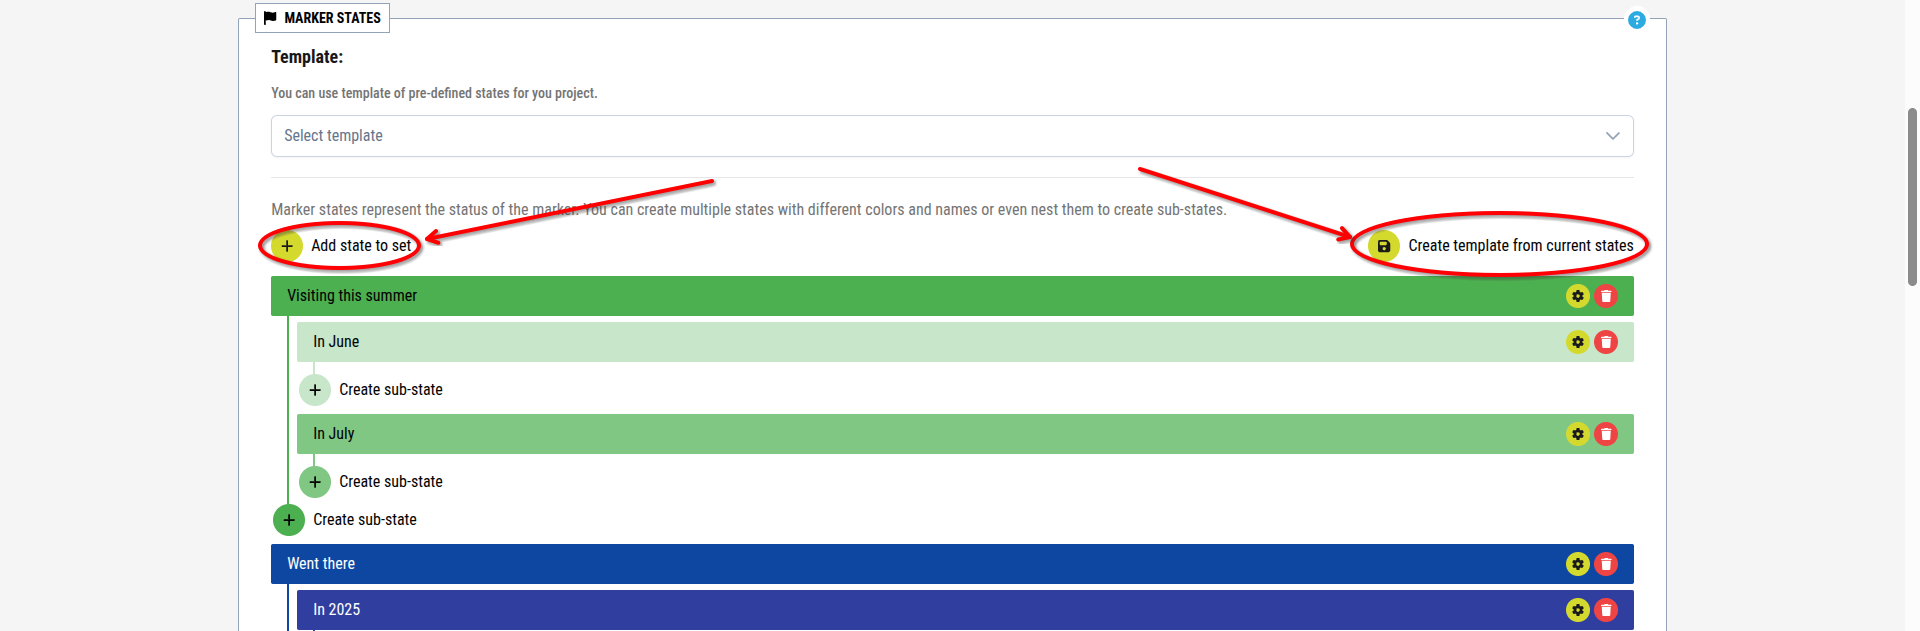
[Showcase of the two buttons on top of the section]
1.2.1. Create a state or sub-state
There are two possibile ways that a [state] can be created:
- Add state to set creates a top-level state
- Create sub-state creates a sub-state under the selected state Steps:
1. Press the Add state to set or Create sub-state button

[Image for step 1]
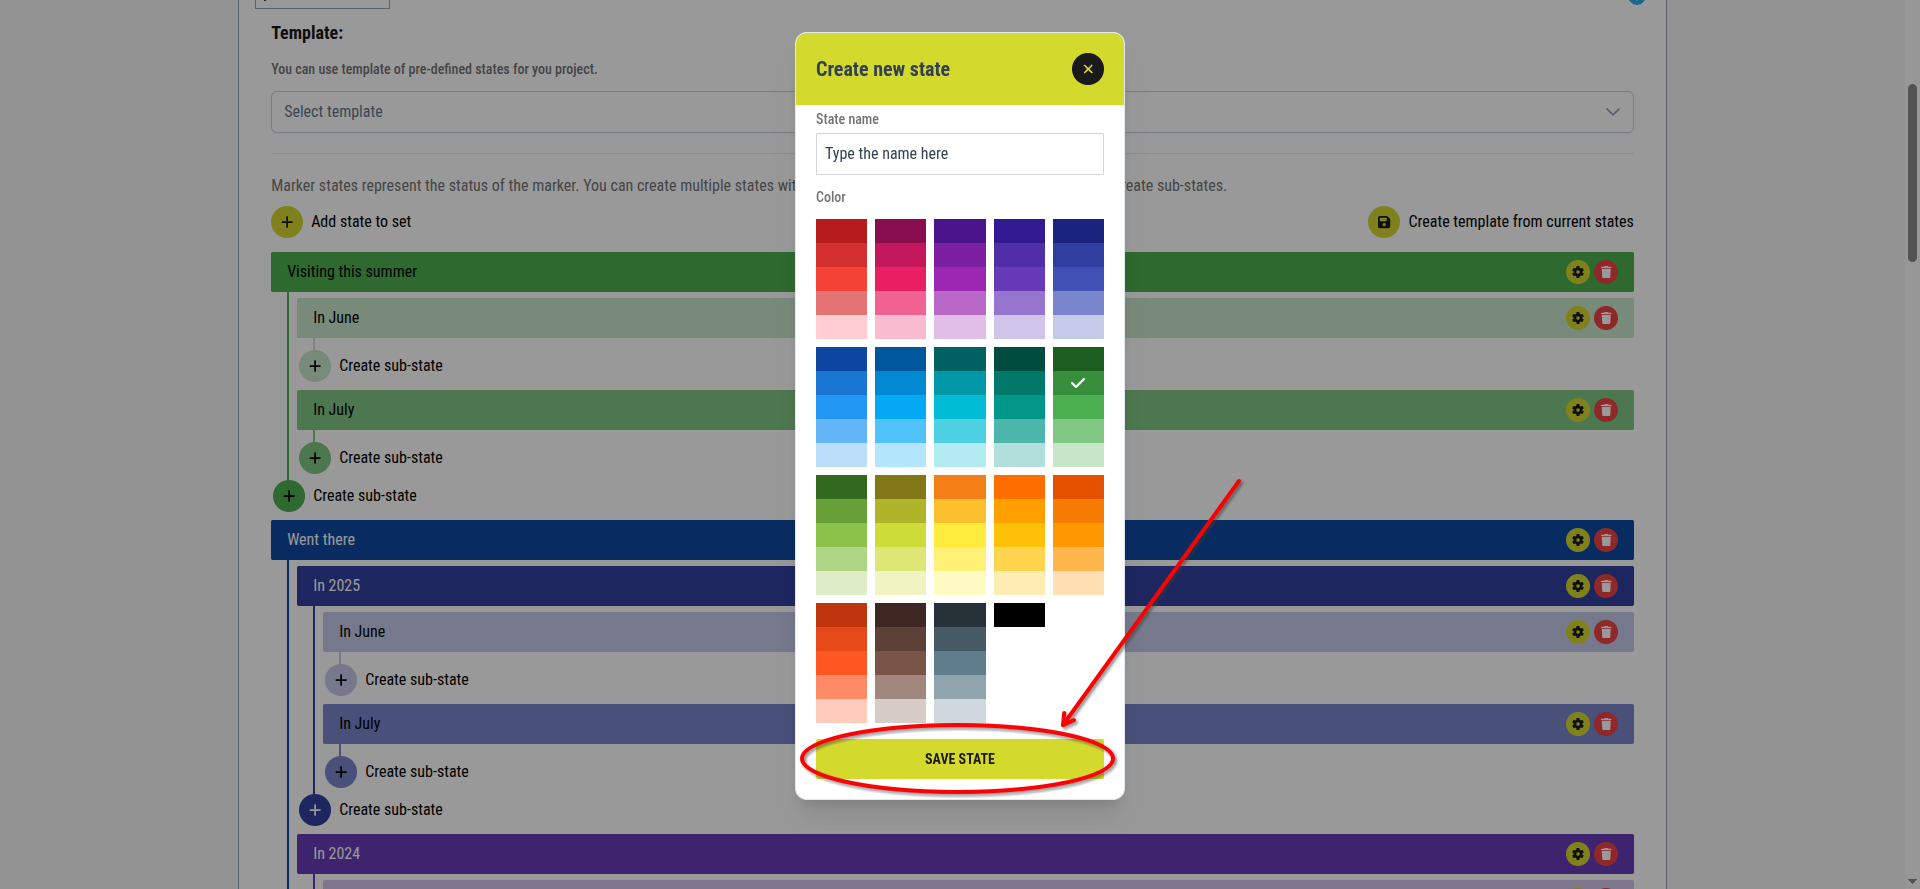
2. Enter the state name in the State name textbox inside the pop up window
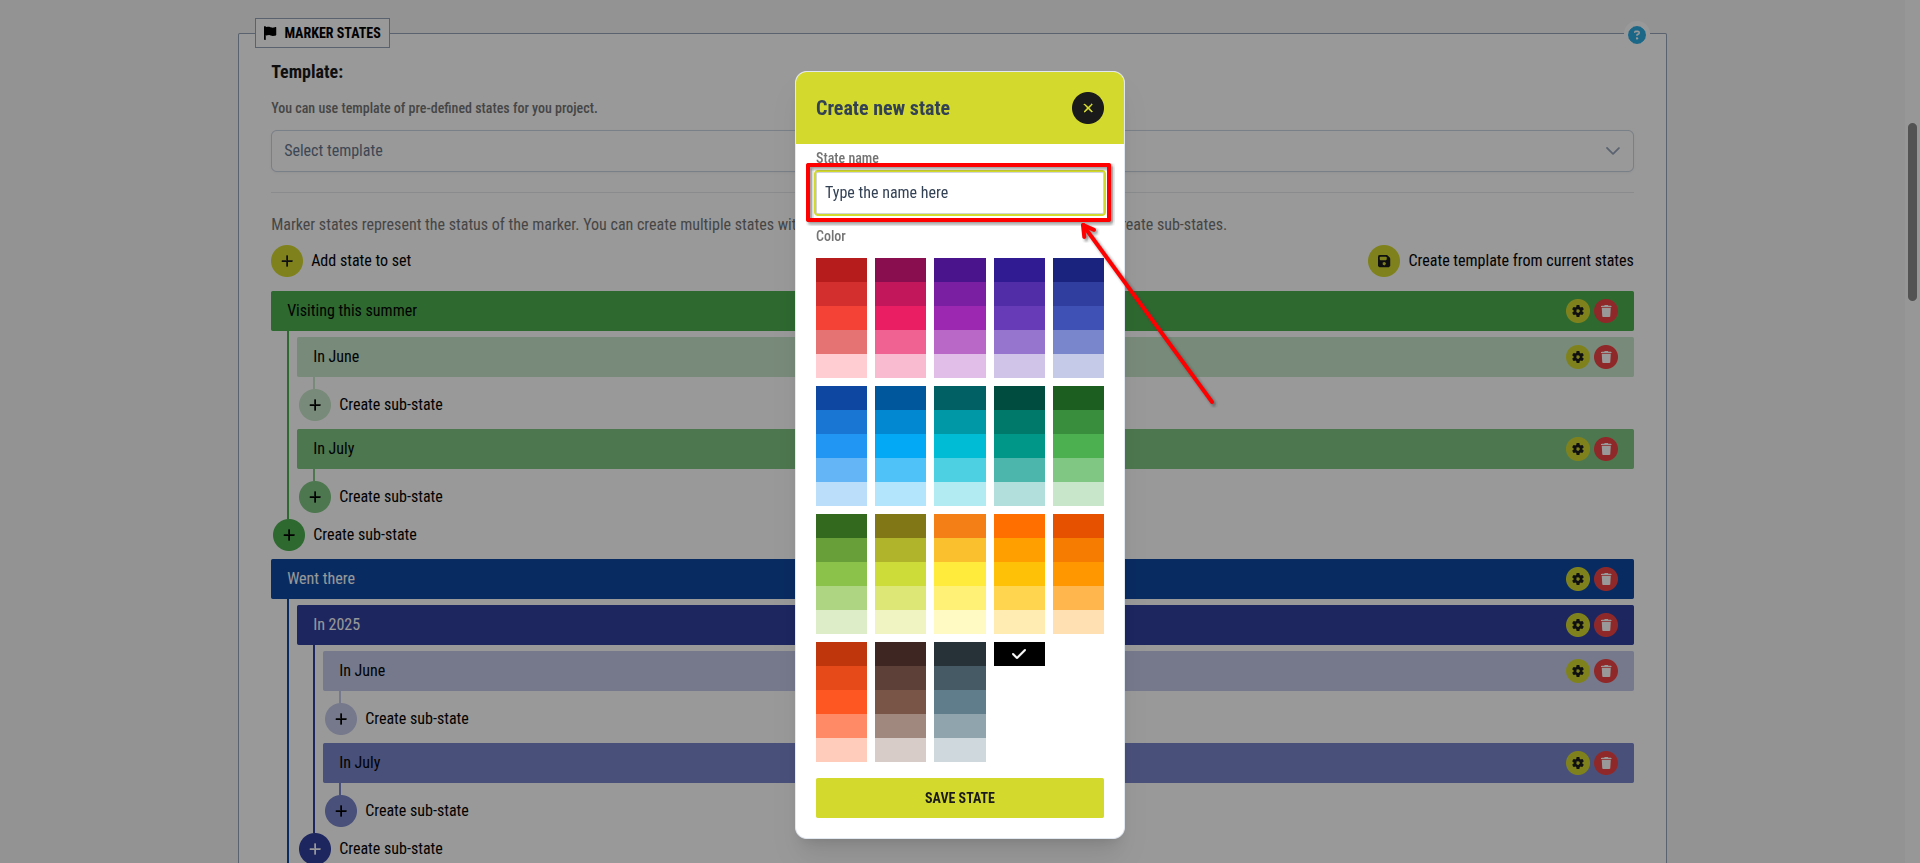
[Image for step 2]
3. Choose a color in the Color section of the pop up window
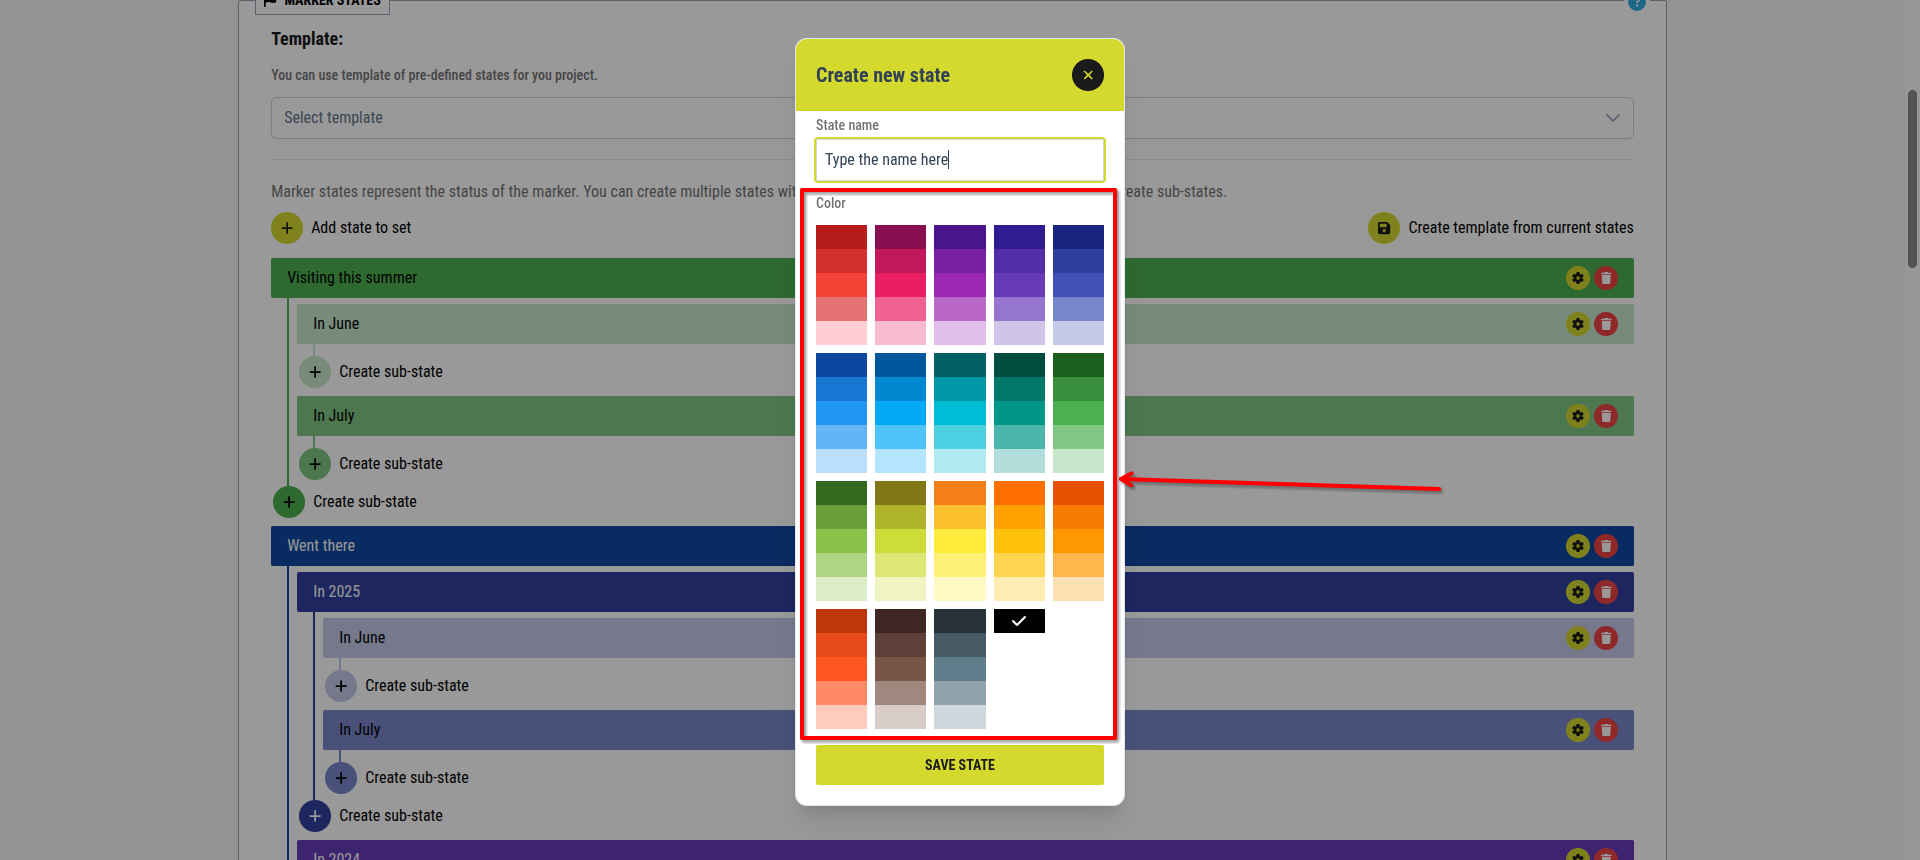
[Image for step 3]
4. Press the Save State button
[Image for step 4]
1.2.2. Edit a state
Each existing state or sub-state can be edited:
1. Click the Settings button next to a state or sub-state

[Image for step 1]
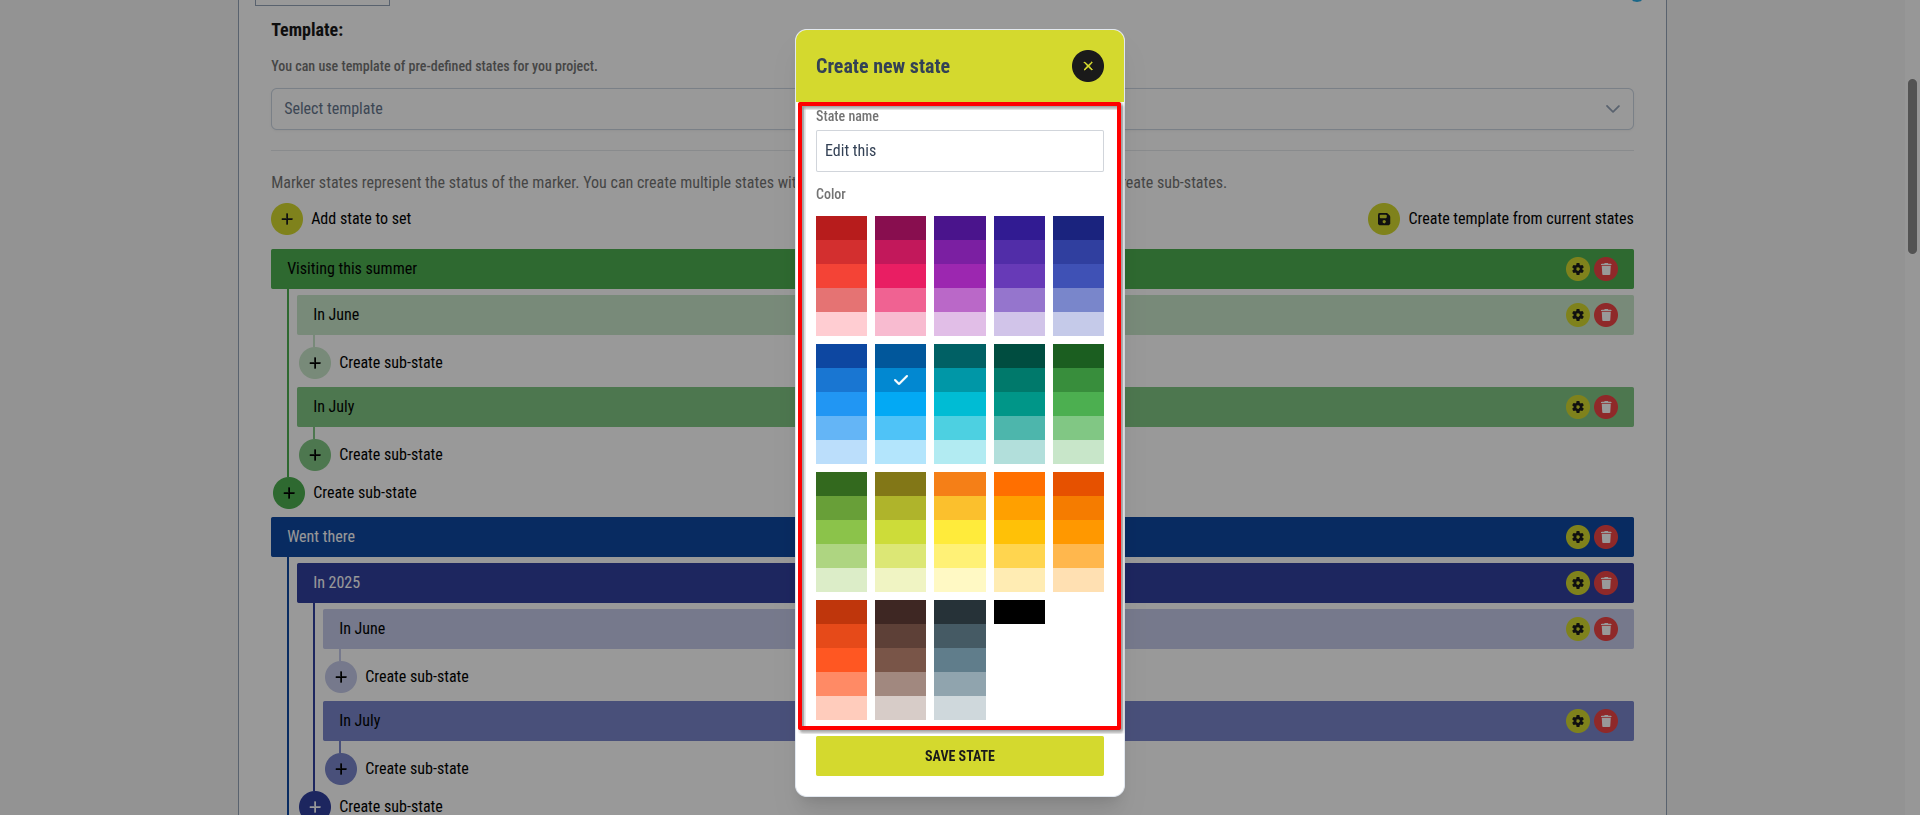
2. Modify the name and/or color
[Image for step 2]
3. Press the Save State button
[Image for step 3]
1.2.3. Delete a state
Any existing state or sub-state can also be delted:
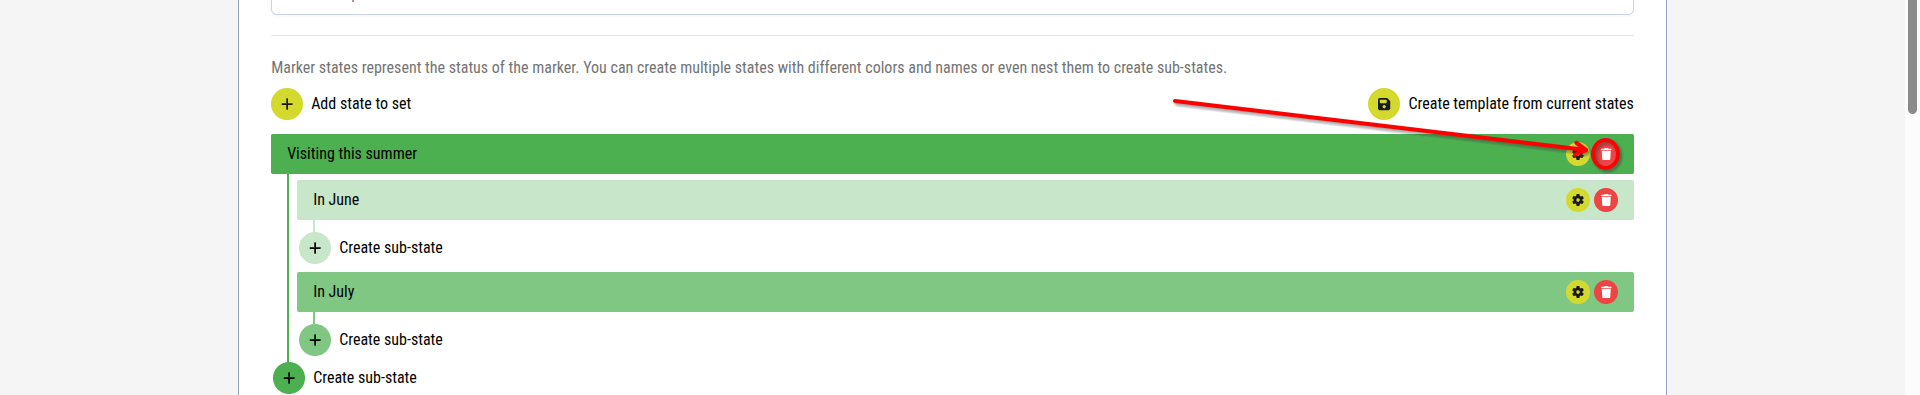
1. Click the Delete (trash) button next to a state or sub-state
[Image for step 1]
2. The state is removed
1.2.4. Create a template from current states
To reuse the current state structure in other projects:
1. Press the Create template from current states button

[Image for step 1]
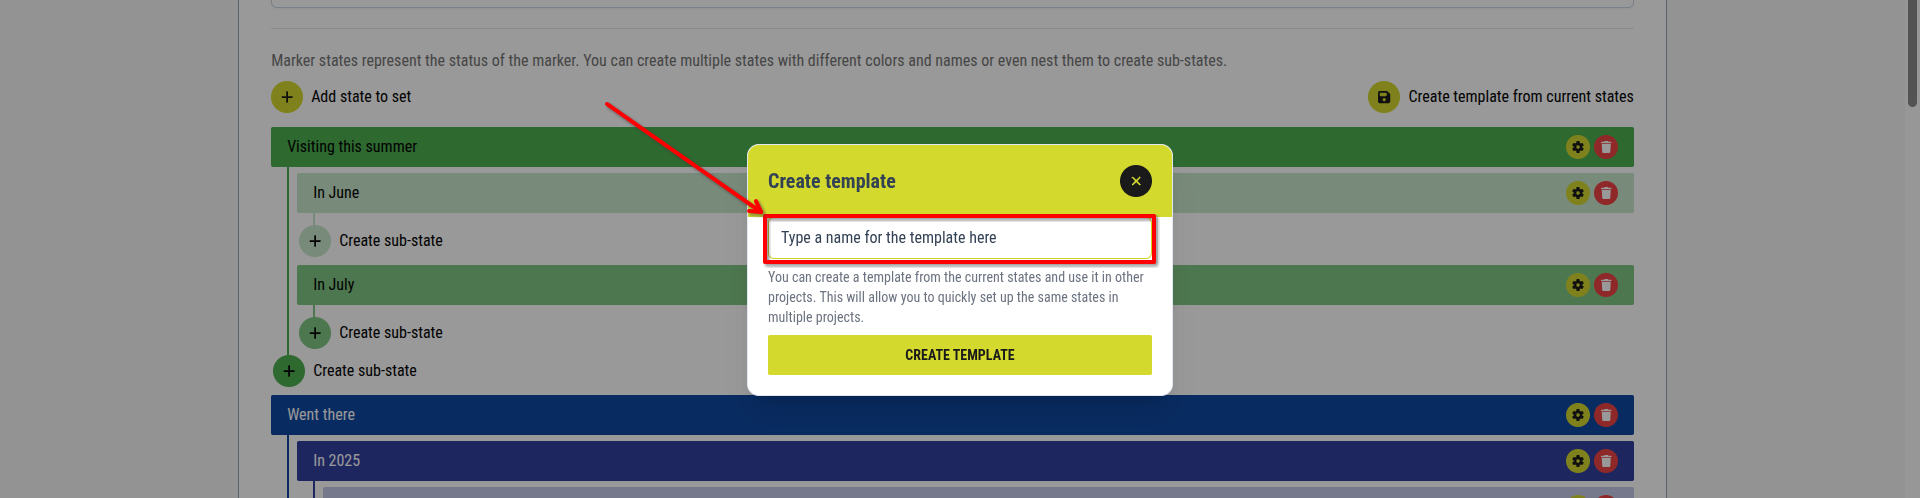
2. Enter a template name
[Image for step 2]
3. Press the Create Template button
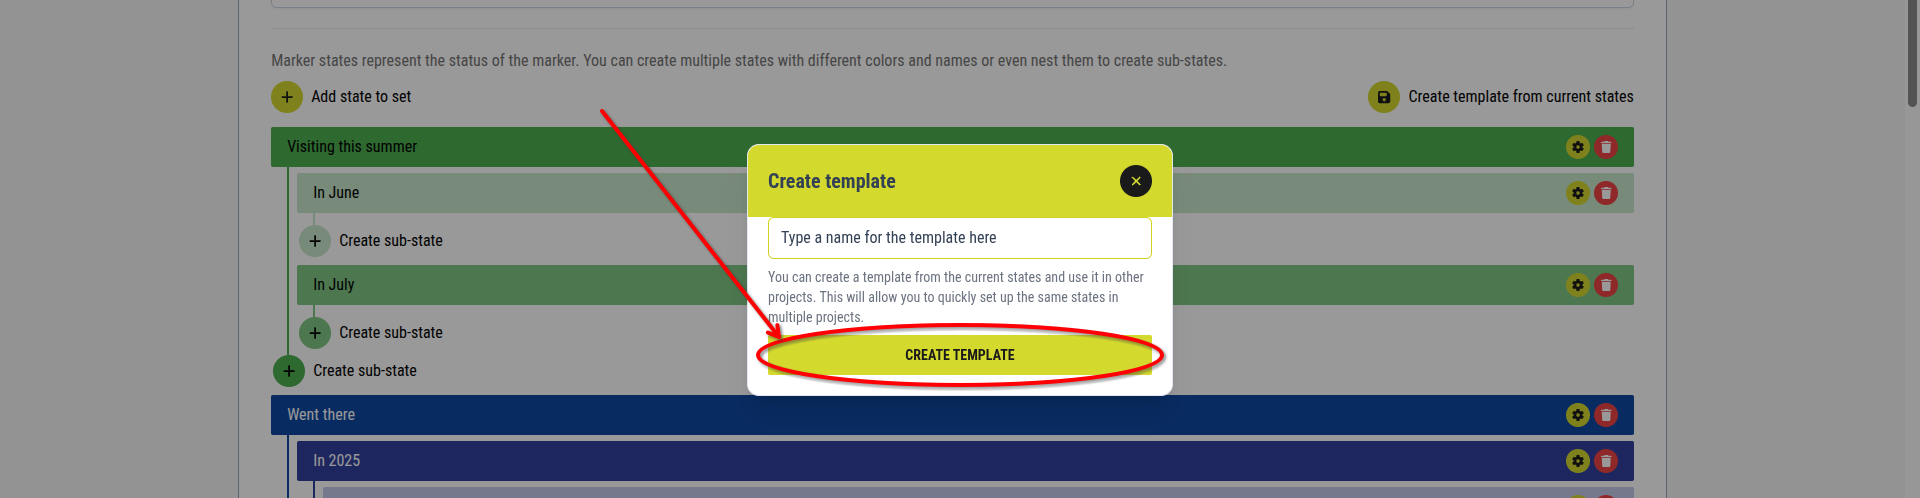
[Image for step 3]
2. Default resource properties
This subsection allows you to define default property keys that will be automatically available for all markers in the project.
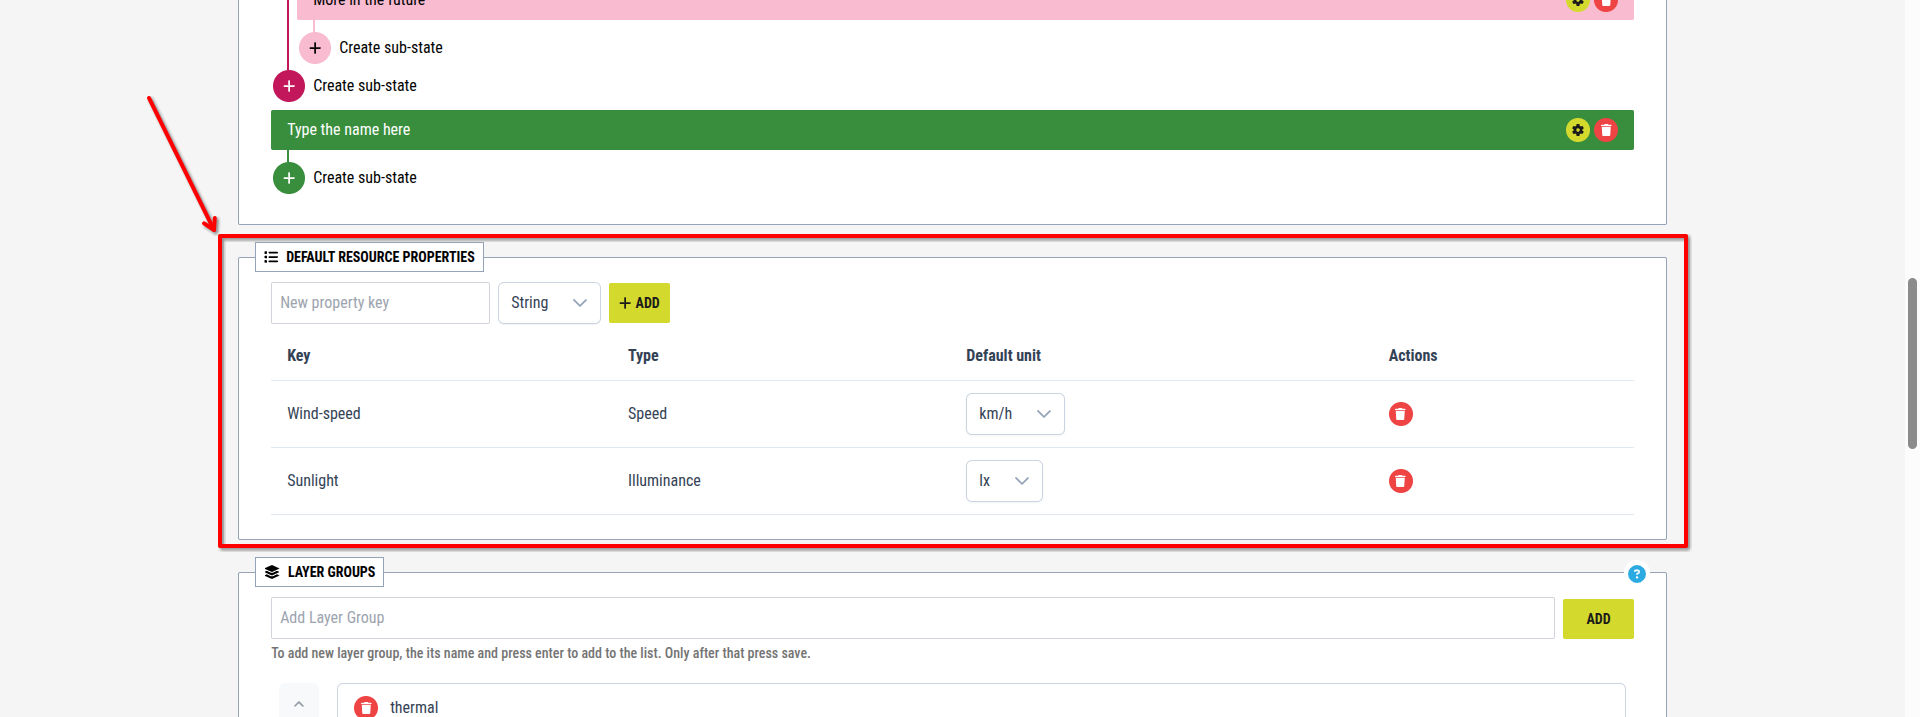
[Showcase of the Default resource properties section of the Marker states project settings]
2.1. Add a property key
This section serves to add a property key that will be automatically avaiable for all markers in the project
1. Enter a name in the New property key field
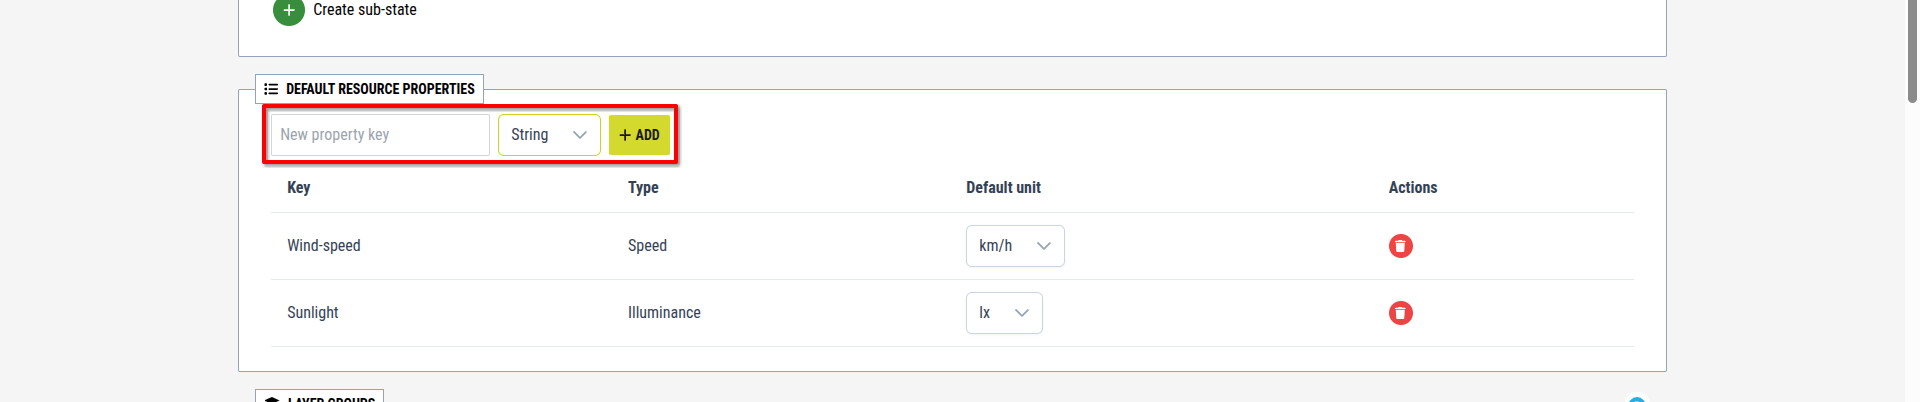
[Image for step 1]
2. Select a property type (e.g., Volume, Pressure)


[Images for step 2]
3. Select a default unit (if applicable)


[Images for step 3]
4. Click Add

[Image for step 4]
2.2. Property key list
Below the input section is a list of all existing property keys.
Each row contains:
- property name
- property type
- default unit
- actions (delete)
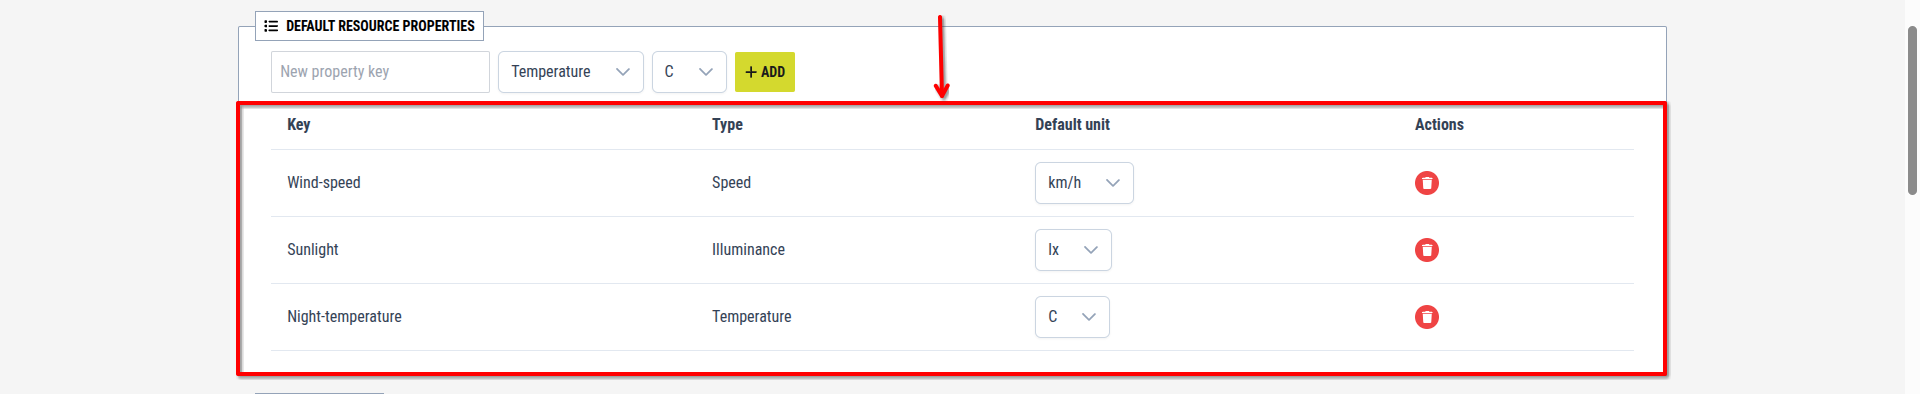
[Showcase of the Property key list in the Marker states project settings]
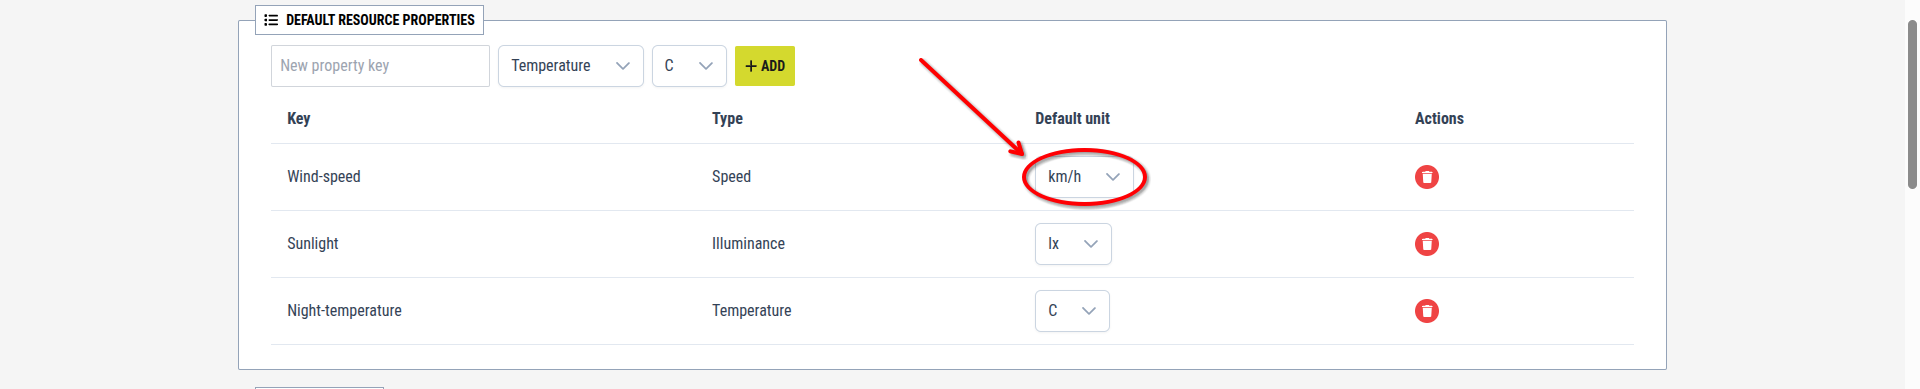
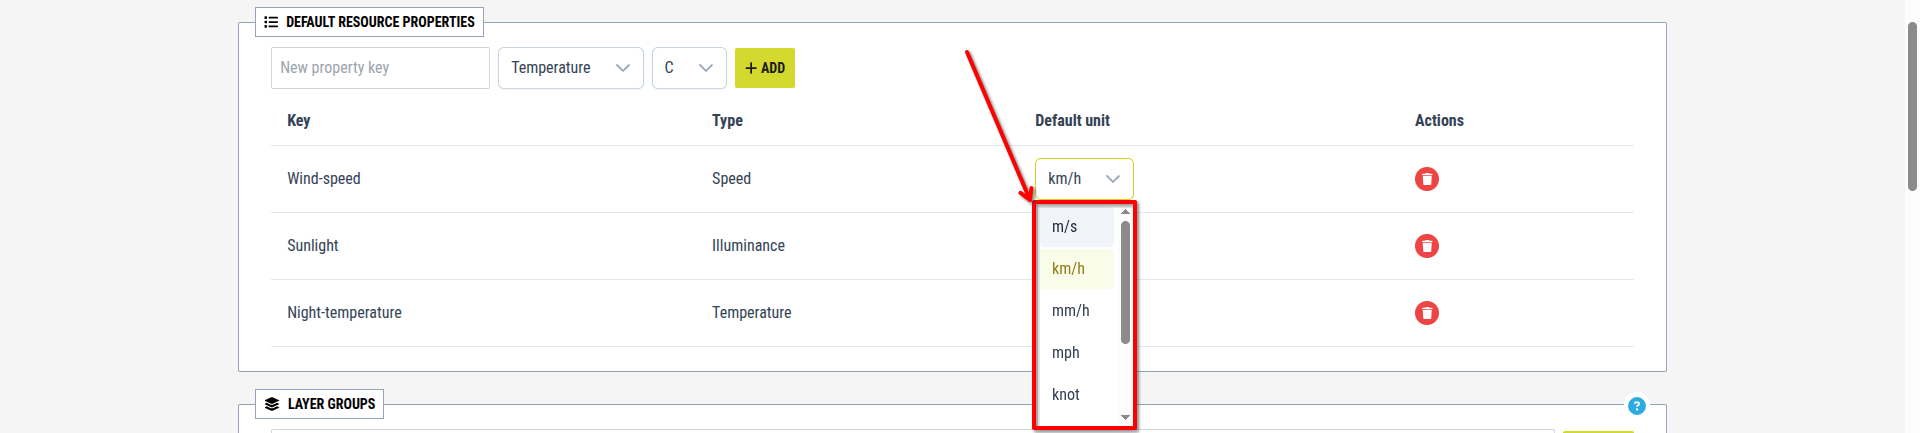
2.2.1. Change default unit
In the property keys, the default unit can be modified (if available):
1. Click the dropdown in the Default unit column
[Image for step 1]
2. Select a new unit
[Image for step 2]
3. The change is applied immediately
2.2.2. Delete a property key
Any existing property keys can be permanently removed from the project:
1. Click the Delete button in the corresponding row

[Image for step 1]